
- Location
- Boston, MA
Ok, here's the part until the removal of the clock assembly. I didn't remove the clock this time but it's easy once you reach the screws under the center console:
0) Shift the lever to N, put on the foot brake
1) Remove the shift knob:http://www.infinitifx.org/vewtopic.php?p=19204#p19..204
-Pull down the leather boot
-You'll see a white plastic piece and a metal clip around it.
-Take out the metal clip and put it somewhere safe
-Take out the shift knob
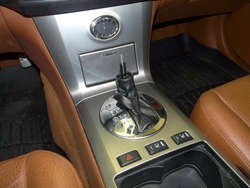
It will look like this (except you'll have an additional blue plastic piece but it doesn't matter):
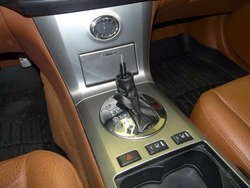
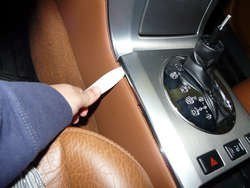
2) Pry apart the center console using a flat plastic piece, a strong plastic knife or your fingers/nails. It's held in place by plastic clips and it's not too hard to pry it. Just don't scratch anything or don't yank on it.
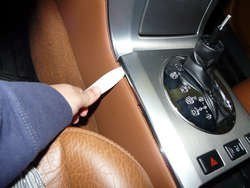
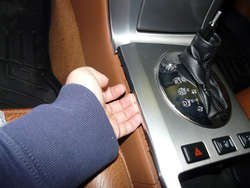
3) When there's enough space, hold it gently with your fingers and start pulling towards the arm rest
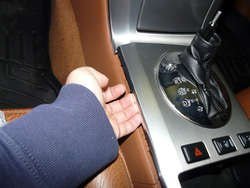
4) Do the same for the other side. Now the center console should be completely off the clips. Pull it out of the shift rod carefully. There are some wires attached beneath so don't pull it too hard. You'll feel when to stop.
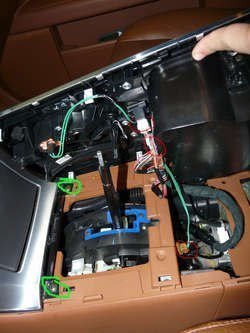
5) Remove the clips holding the wires below. When you remove the wires, put the whole center console some place safe. The screws marked with green are the ones you'll remove for clock assembly removal.
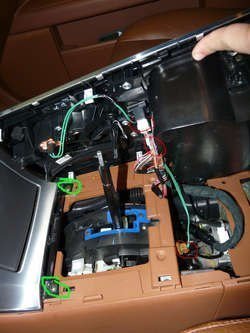
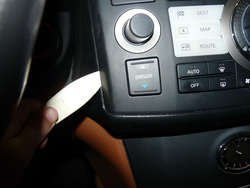
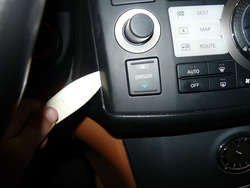
6) Take out the radio faceplate. Start from lower left hand corner and pry it apart carefully with your plastic blade, knife or fingers/nails

Keep on prying until all of the clips are off. There are two cables behind it. Remove those using their clips.
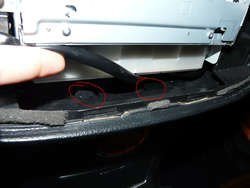
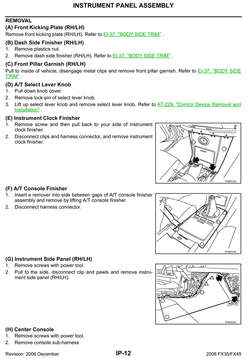
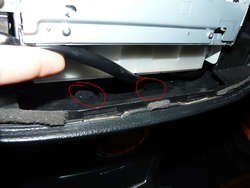
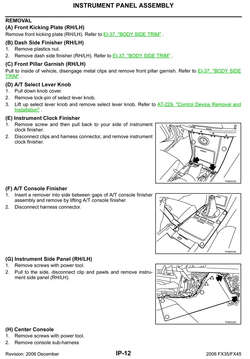
7) Now I got lazy to take out the whole radio unit but in this picture below you can see clearly which clips to remove. There are 4 of them. There are 4 screws that hold the radio unit and screen together and there are some harnesses at the back to remove. Service manual page is also below to clear up things
0) Shift the lever to N, put on the foot brake
1) Remove the shift knob:http://www.infinitifx.org/vewtopic.php?p=19204#p19..204
-Pull down the leather boot
-You'll see a white plastic piece and a metal clip around it.
-Take out the metal clip and put it somewhere safe
-Take out the shift knob
It will look like this (except you'll have an additional blue plastic piece but it doesn't matter):
2) Pry apart the center console using a flat plastic piece, a strong plastic knife or your fingers/nails. It's held in place by plastic clips and it's not too hard to pry it. Just don't scratch anything or don't yank on it.
3) When there's enough space, hold it gently with your fingers and start pulling towards the arm rest
4) Do the same for the other side. Now the center console should be completely off the clips. Pull it out of the shift rod carefully. There are some wires attached beneath so don't pull it too hard. You'll feel when to stop.
5) Remove the clips holding the wires below. When you remove the wires, put the whole center console some place safe. The screws marked with green are the ones you'll remove for clock assembly removal.
6) Take out the radio faceplate. Start from lower left hand corner and pry it apart carefully with your plastic blade, knife or fingers/nails
Keep on prying until all of the clips are off. There are two cables behind it. Remove those using their clips.
7) Now I got lazy to take out the whole radio unit but in this picture below you can see clearly which clips to remove. There are 4 of them. There are 4 screws that hold the radio unit and screen together and there are some harnesses at the back to remove. Service manual page is also below to clear up things

 Thanks Dave!


