

:ninja:Disclaimer: Use this DIY at your own risk, as I will not be responsible for any damages or problems this DIY may cause. :ninja:
And this is probably the first time a DIY is dedicated to someone on here. I dedicate it to Justin (simjus) for being persistent with reminding me to finish it up and post it for everyone's enjoyment :good:
Difficulty Level: 3.5 out of 5
1 being easy, 5 requiring some advanced tools and skills.
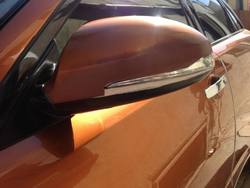
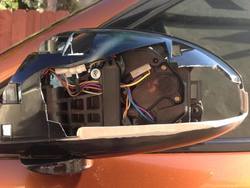
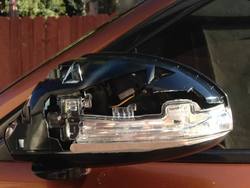
This DIY should provide anyone with enough info and guidance on how to retrofit and add mirror turn signal from Volvo S40 onto 1st Gen FX mirror covers. Please be advised that besides cutting an opening in the cover some additional trimming of under the cover physical mirror will be required to allow housing of the lens. (see attached pictures for reference).
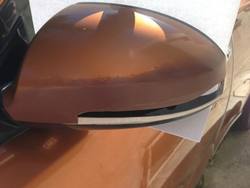
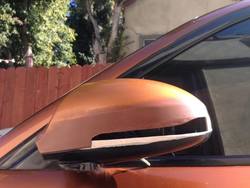
My images will not depict a brand new cover, instead I had to perform some reconstruction and filling in of the opening from my previous retrofit of Audi turn signals, so don't be alarmed that my pictures look as if a lot of work was required. With that said, this is one attempt deal only, you make a wrong cut, you will need wether a new cover or use body filler to correct it.
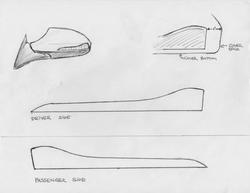
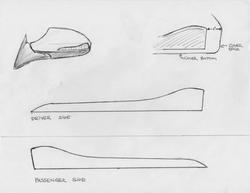
I am including a template in the DIY to help anyone get started easily. When tracing the opening remember to cut it out smaller so you have some room left to trim and create a snug fit. The lens will not fit 100% perfectly, the bottom part will be flushed, the upper building part will leave a bit of a gap, but only visible when looking from underneath, and it can be filled with sealer to prevent water or wind from going through it.
Now let's get started
Parts needed:
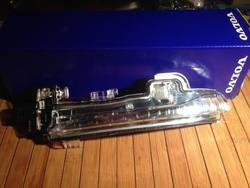
Volvo S40 mirror indicators (turn signals),LH: 31299384, RH: 31299385.
The price range on that part is anywhere between $18 - $30 per indicator. Shop around at your local dealerships or on line, it helps if there is more than one. Here is one place you can try: http://www.jimellisvolvoparts.com/p/Volvo__/Lens/7063021/31299384.html
The indicator does not come with a plug or wiring so you will need to create your own.
Tools needed:
Glue gun or a weather sealer
Dremel
Utility knife or/and scalpel
Nail file for founded edges or/and sand paper
14 gauge wire (red/black) or whatever color you have/like
2x tap splices
1x ring terminal
2 x wire connectors, in case you ever have to take your mirrors out and can easily unplug the turn signals with the rest of the wiring.
How-to-Use-Electrical-Wire-Connectors.jpg
wire strippers
electrical tape
masking tape
gloves
safety glasses
optional vinyl wrap or paint to cover/mask any imperfections.
and ...
A lot of patience and time!
It took me roughly 2 hours per mirror.
Getting started:
Print out the template attached to this DIY and trace it on the mirror. Using a painters tape on top of the cover will make it easier to draw and then cut and protect the rest of the cover from accidental cuts/scuffs.
There is no way of attaching the indicator to the cover with screws except using wether a glue (heat gun reference), epoxy or strong tape. Your choice.
Finishing the hooking up of the mirror cover and LED signal:
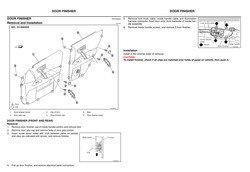
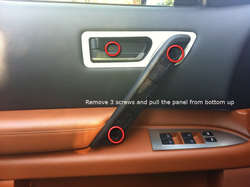
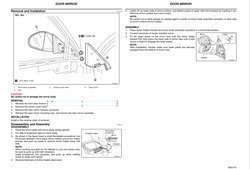
In order to get the LED to work you need to run the wires through the mirror harness to the interior of your FX. Remove the door panels and triangle mirror panel to expose the bolts and proceed with mirror removal, see instruction below.
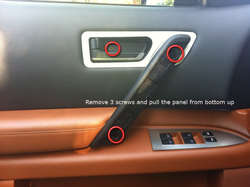
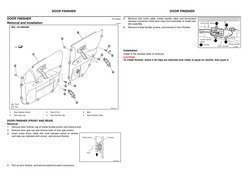
Door panel removal info:
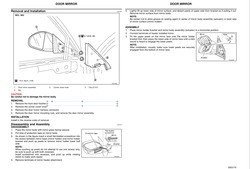
Mirror removal info:
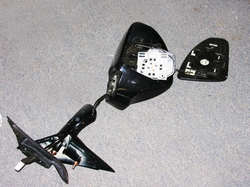
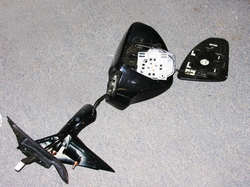
The cover will not fit without cutting out the opening for the LED board part and the rest of the indicator to make it fit in the mirror assembly. With the mirror safely taken off the FX do the following::
Hooking up the LEDs.
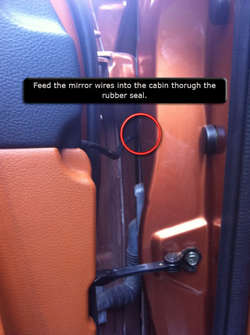
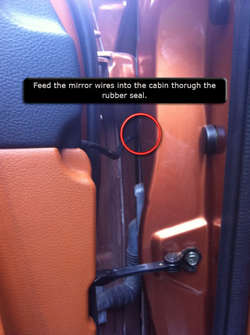
With the mirror in place, all it’s left is to run the wires through the door into the cabin and all the way to the fuse panel by the dead pedal on the driver’s side.
Hope I covered everything. If you are unsure about any steps or have questions, let me know.
Good luck.
Here is the finished project.
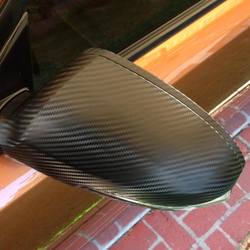
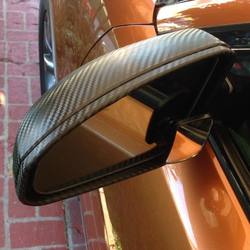
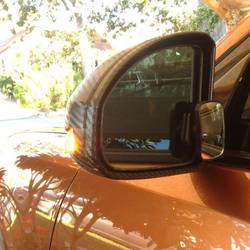
---------- Post added at 10:15 PM ---------- Previous post was at 09:58 PM ----------
A short video, will make a better one tomorrow.
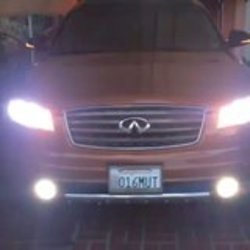
And this is probably the first time a DIY is dedicated to someone on here. I dedicate it to Justin (simjus) for being persistent with reminding me to finish it up and post it for everyone's enjoyment :good:
Difficulty Level: 3.5 out of 5
1 being easy, 5 requiring some advanced tools and skills.
This DIY should provide anyone with enough info and guidance on how to retrofit and add mirror turn signal from Volvo S40 onto 1st Gen FX mirror covers. Please be advised that besides cutting an opening in the cover some additional trimming of under the cover physical mirror will be required to allow housing of the lens. (see attached pictures for reference).
My images will not depict a brand new cover, instead I had to perform some reconstruction and filling in of the opening from my previous retrofit of Audi turn signals, so don't be alarmed that my pictures look as if a lot of work was required. With that said, this is one attempt deal only, you make a wrong cut, you will need wether a new cover or use body filler to correct it.
I am including a template in the DIY to help anyone get started easily. When tracing the opening remember to cut it out smaller so you have some room left to trim and create a snug fit. The lens will not fit 100% perfectly, the bottom part will be flushed, the upper building part will leave a bit of a gap, but only visible when looking from underneath, and it can be filled with sealer to prevent water or wind from going through it.
Now let's get started
Parts needed:
Volvo S40 mirror indicators (turn signals),LH: 31299384, RH: 31299385.
The price range on that part is anywhere between $18 - $30 per indicator. Shop around at your local dealerships or on line, it helps if there is more than one. Here is one place you can try: http://www.jimellisvolvoparts.com/p/Volvo__/Lens/7063021/31299384.html
The indicator does not come with a plug or wiring so you will need to create your own.
Tools needed:
Glue gun or a weather sealer
Dremel
Utility knife or/and scalpel
Nail file for founded edges or/and sand paper
14 gauge wire (red/black) or whatever color you have/like
2x tap splices
1x ring terminal
2 x wire connectors, in case you ever have to take your mirrors out and can easily unplug the turn signals with the rest of the wiring.
How-to-Use-Electrical-Wire-Connectors.jpg
wire strippers
electrical tape
masking tape
gloves
safety glasses
optional vinyl wrap or paint to cover/mask any imperfections.
and ...
A lot of patience and time!
It took me roughly 2 hours per mirror.
Getting started:
Print out the template attached to this DIY and trace it on the mirror. Using a painters tape on top of the cover will make it easier to draw and then cut and protect the rest of the cover from accidental cuts/scuffs.
There is no way of attaching the indicator to the cover with screws except using wether a glue (heat gun reference), epoxy or strong tape. Your choice.
Finishing the hooking up of the mirror cover and LED signal:
In order to get the LED to work you need to run the wires through the mirror harness to the interior of your FX. Remove the door panels and triangle mirror panel to expose the bolts and proceed with mirror removal, see instruction below.
Door panel removal info:
Mirror removal info:
The cover will not fit without cutting out the opening for the LED board part and the rest of the indicator to make it fit in the mirror assembly. With the mirror safely taken off the FX do the following::
- Remove the mirror by pulling the rubber insulation off the mirror assembly on the triangular piece. Pull it down the insulated cables, there might be some electrical tape keeping it in place, remove that too.
- Remove 3 screws on the bottom of the assembly. One of them might be covered by a round black sticker, heat it up and it will peel right off, you want to put it back on when done. With the screws gone, wiggle it to separate the assembly from the triangular base.
- Remove the mirror glass by flipping the mirror upside down and using your fingers or plastic tool or a screwdriver wrapped in a cloth to first unsnap the bottom clips and then slide the glass off. Note there are two wires attached to it for the heater, you can disconnect them, just mark with the sharpie one of them, so you know where to plug it back. You might need pliers to pull them, mine were on real tight.
- Remove the mirror motor by unscrewing the 3 outer screws on the black piece, the ones on the white moving part don’t need to be taken out. There is a 4th screw keeping the motor in place. It’s located at the bottom of the pivot piece on the exposed metal part.
- Detach the white plug from the back of the motor piece, the black sensor that is held by 2 screws and a brown/white cable. They will need to be placed to the side of the mirror facing the door when putting it together. Those elements are in the way of the LED board piece. Trim down the area where the black sensor and white plug was till it’s flat enough for the cover to slide in.
- Thread the LED cover wires through the existing wire out in the mirror assembly.
- You will also need to trim down the bottom part of the assembly where the skinny LED parts will go.
- When all the fitting and cutting is done, you can put the entire mirror back together and place it back on the FX.
Hooking up the LEDs.
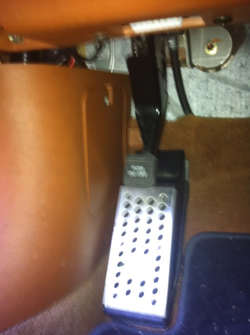
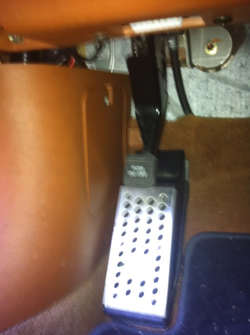
With the mirror in place, all it’s left is to run the wires through the door into the cabin and all the way to the fuse panel by the dead pedal on the driver’s side.
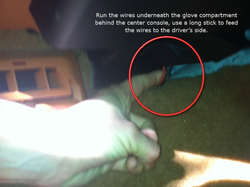
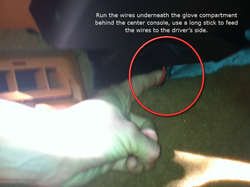
- Run the cables into the car through a small round rubber seal. From the passenger side, remove the glove compartment to grab the wires and pull them behind under the dash to the driver’s side.
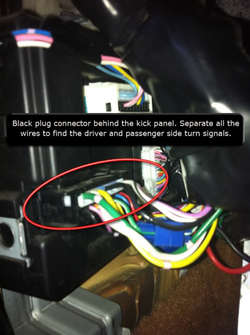
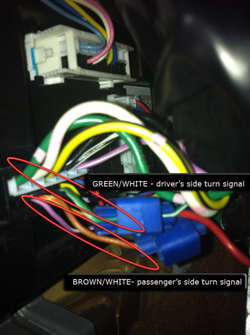
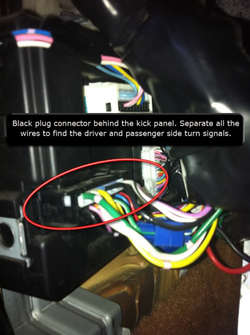
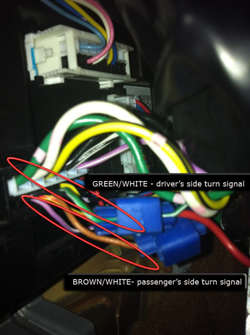
- Wires from both mirrors should be now at the fuse box. Remove the kick panel to expose wires that connect to the car. Look for a black plug. Locate the following wires: Driver side turn signal green/white, passenger turn signal brown/white.
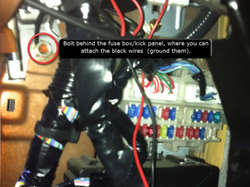
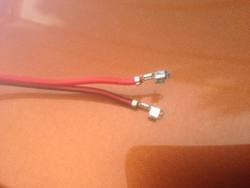
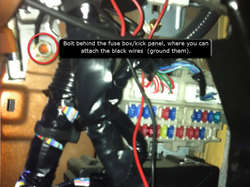
- Connect the red cable from both mirrors to their respective sides using the tap splices. Twist the black wires together and using a ring terminal attach them to the body of the FX, there is a bold right behind the fuse box that’s perfect for that.
- Start the car and test the signals.
- If everything works, put all the panels back on and enjoy.
Hope I covered everything. If you are unsure about any steps or have questions, let me know.
Good luck.
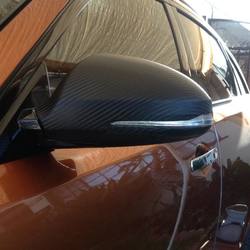
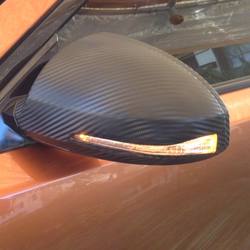
Here is the finished project.
---------- Post added at 10:15 PM ---------- Previous post was at 09:58 PM ----------
A short video, will make a better one tomorrow.
Attachments
-
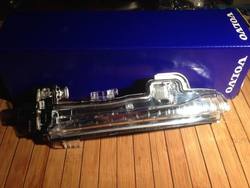 photo1_zpsf315e29f.jpg38.9 KB · Views: 66
-
 InfinitiFXmirrortemplate_zps18de2edd.jpe21.3 KB · Views: 41
-
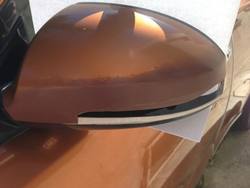 photo4_zps5335271c.jpg22.1 KB · Views: 44
-
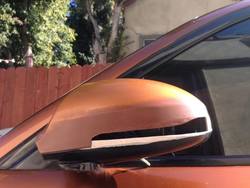 photo3_zpsf1122f6a.jpg37.1 KB · Views: 36
-
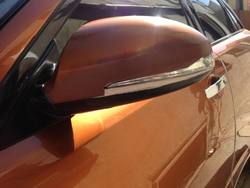 photo5_zps0a39d3a9.jpg30.6 KB · Views: 51
-
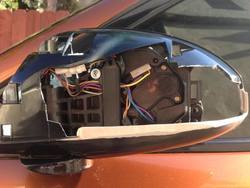 photo10_zps65cdd01d.jpg40.2 KB · Views: 38
-
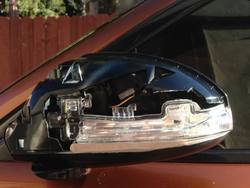 photo11_zpsb003c0a6.jpg36.5 KB · Views: 64
-
 ScreenShot2012-03-02at35047PM.png14.8 KB · Views: 52
-
 panel.jpg46.3 KB · Views: 35
-
 ScreenShot2012-03-02at35425PM.png19.2 KB · Views: 46
-
 mirrorapart.jpg70.7 KB · Views: 42
-
 seal.jpg47.9 KB · Views: 42
-
 wires.jpg31.7 KB · Views: 30
-
 kickpanel.jpg31.8 KB · Views: 54
-
 blackplug.jpg49.6 KB · Views: 43
-
 wiresgreenbrown.jpg46.2 KB · Views: 61
-
 bolt.jpg52.9 KB · Views: 40
-
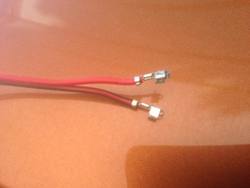 photo13_zpsb1145968.jpg21.9 KB · Views: 63
-
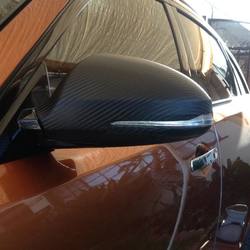 photo14_zps3359a82b.jpg47.5 KB · Views: 38
-
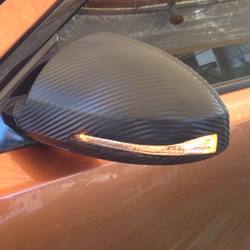 photo8_zps95d4a544.jpg38.4 KB · Views: 39
-
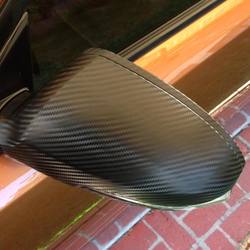 photo7_zps1d988beb.jpg48.4 KB · Views: 37
-
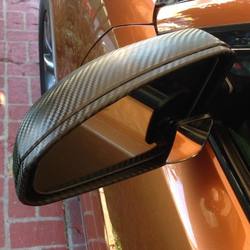 photo6_zps1698474f.jpg48.4 KB · Views: 37
-
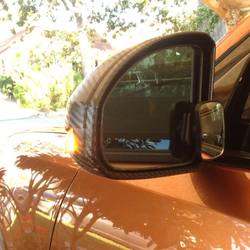 photo9_zpse9ca1815.jpg56.2 KB · Views: 40
-
 th_MOV_0764_zpsed421246.jpg4.7 KB · Views: 45
Last edited:


