
- Location
- Portland, OR
I noticed recently a pretty loud “click” sound upon shifting into D from P, and especially when shifting from D to R. A quick search on IS resulted in a link to this THREAD on another site with a DIY for a 350z. There is a TSB about this issue for the G35, but I decided to do it myself today because I work during the hours that the stealership is open and it’s about 30min from my house. I also read something about the possibility of warranted service being declined for having lowering springs. Anyway, here is the FX axle click remedy DIY:
Tools required:
-Hydraulic floor jack (1 ton min) <-personal opinion
-Jack stands (1 ton min) <-personal opinion
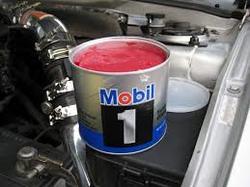
-High temp extreme pressure grease (Nissan recommends Molykote grease. I didn’t have any so I used this:
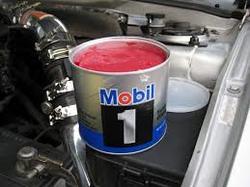
I’m not sure what the difference might be, but the job is fairly easy and my grease is about 90% cheaper. If the click returns I’ll probably order the Moly grease and do it again.)
-Service removable loc-tite (blue)
-Flat head screw driver
-Needle nosed pliers
-Torque wrench 0-200ft lbs
-Dead blow hammer or rubber mallet (If you must use a metal hammer, use a block of wood or something to avoid damaging the axle threads. )
-14mm socket
-14mm box wrench
-21mm socket
-32mm deep socket
-Large heavy duty breaker bar or impact gun
-A crawler to slide around under the car is a plus, but not necessary.
-Some disposable latex gloves are also nice.
.
Torque specs: (1nm = 0.73756 ftlbs)
-Wheel “lug” nut (21mm).........80ft lbs
-Axle nut (32mm)...................177 ft lbs
-Shaft flange bolt (14mm)....... 52 ft lbs
.
.
.
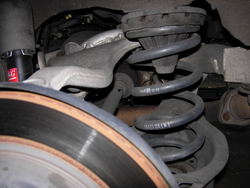
1.Break the wheel nuts free prior to raising the car up onto jack stands. I applied the fix to both rear axles, so I raised both sides up onto jack stands at the same time. This also provides a good amount of room to work under the rear of the vehicle. If you want to do one side at a time, obviously you would only need to lift one corner.
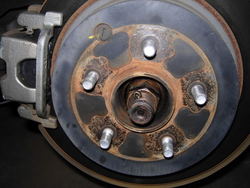
2.Finish removing wheel nuts and remove wheel.
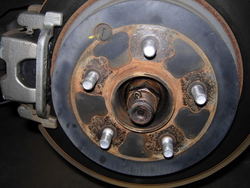
3.Remove cotter pin by straightening the bent end and pulling the pin out of the hole. If you plan on reusing the pin I would suggest limiting the number of times you bend it back and forth to avoid breaking off the tail. The hole in which it resides is quite oversized so you should be able to bend it “straight enough” to remove in one motion.
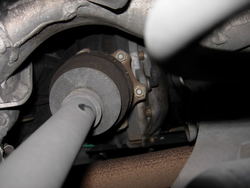
4.Engage your e-brake to lock the rear axles. Then, using your 32mm deep socket and breaker bar, break the axle nut loose and remove it. At this point the outer end of the axle is free to be pulled out from the inside, but held on by the (6) bolts at the other end of the shaft.
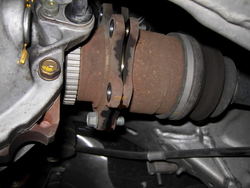
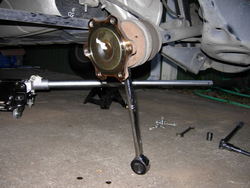
5.This is the view of the axle flange from the side. As you can see it would be quite awkward to attempt to remove the bolts from this angle.
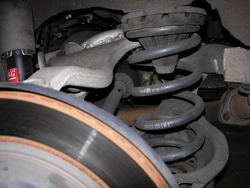
A closer view from the outside:
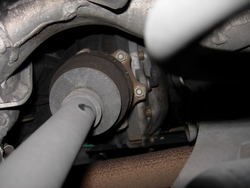
This is the view from the bottom. Much better...
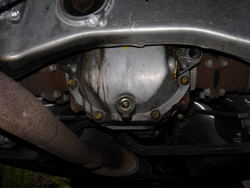
6. You should be able to remove four of the six bolts before releasing the e-brake, rotating the shaft, and re-engaging the brake to remove the last two. As you start to loosen the final bolt, the axle will start to come apart.
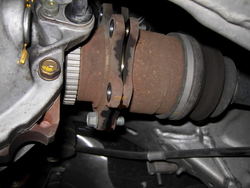
This is a good time to grab something you can use to prop up the shaft when you remove that last bolt. Letting it drop puts stress on the CV joint and is not preferred.
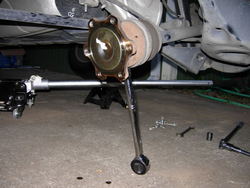
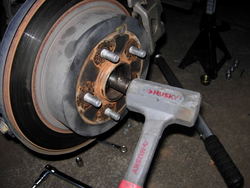
7.Once the axle is free and resting on something (in retrospect a socket wrench is probably not the best idea. It did work but it is definitely on the “less stable” end of the list of options.) you can gently tap the outer end of the axle with your soft hammer until it starts to move inward. Be very careful on the threaded end; damaging the threads ruins your shaft and they are really expensive.
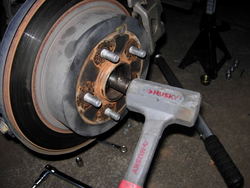
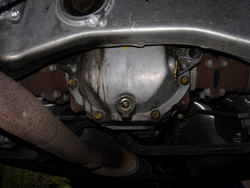
8.Get back under the car and carefully pull the axle toward the rear differential until it is free of the hub. It isn’t too difficult but it does require some effort and the axle itself is surprisingly heavy.
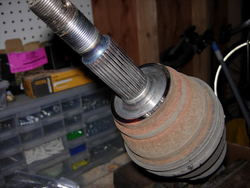
9.Here is my passenger side rear axle. Note the absolute absence of any kind of grease…
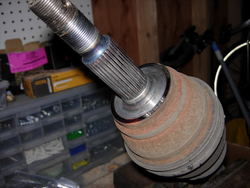
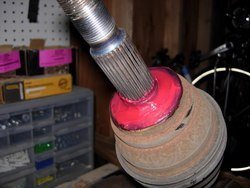
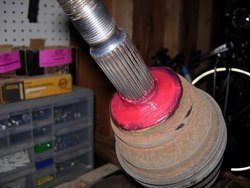
10.Grease the area between the spline and the face of the flange liberally.
11.Apply loc-tite to every bolt you have removed and reinstall using the torque specs above.
12.Go for a click-less test drive!

Tools required:
-Hydraulic floor jack (1 ton min) <-personal opinion
-Jack stands (1 ton min) <-personal opinion
-High temp extreme pressure grease (Nissan recommends Molykote grease. I didn’t have any so I used this:
I’m not sure what the difference might be, but the job is fairly easy and my grease is about 90% cheaper. If the click returns I’ll probably order the Moly grease and do it again.)
-Service removable loc-tite (blue)
-Flat head screw driver
-Needle nosed pliers
-Torque wrench 0-200ft lbs
-Dead blow hammer or rubber mallet (If you must use a metal hammer, use a block of wood or something to avoid damaging the axle threads. )
-14mm socket
-14mm box wrench
-21mm socket
-32mm deep socket
-Large heavy duty breaker bar or impact gun
-A crawler to slide around under the car is a plus, but not necessary.
-Some disposable latex gloves are also nice.
.
Torque specs: (1nm = 0.73756 ftlbs)
-Wheel “lug” nut (21mm).........80ft lbs
-Axle nut (32mm)...................177 ft lbs
-Shaft flange bolt (14mm)....... 52 ft lbs
.
.
.
1.Break the wheel nuts free prior to raising the car up onto jack stands. I applied the fix to both rear axles, so I raised both sides up onto jack stands at the same time. This also provides a good amount of room to work under the rear of the vehicle. If you want to do one side at a time, obviously you would only need to lift one corner.
2.Finish removing wheel nuts and remove wheel.
3.Remove cotter pin by straightening the bent end and pulling the pin out of the hole. If you plan on reusing the pin I would suggest limiting the number of times you bend it back and forth to avoid breaking off the tail. The hole in which it resides is quite oversized so you should be able to bend it “straight enough” to remove in one motion.
4.Engage your e-brake to lock the rear axles. Then, using your 32mm deep socket and breaker bar, break the axle nut loose and remove it. At this point the outer end of the axle is free to be pulled out from the inside, but held on by the (6) bolts at the other end of the shaft.
5.This is the view of the axle flange from the side. As you can see it would be quite awkward to attempt to remove the bolts from this angle.
A closer view from the outside:
This is the view from the bottom. Much better...
6. You should be able to remove four of the six bolts before releasing the e-brake, rotating the shaft, and re-engaging the brake to remove the last two. As you start to loosen the final bolt, the axle will start to come apart.
This is a good time to grab something you can use to prop up the shaft when you remove that last bolt. Letting it drop puts stress on the CV joint and is not preferred.
7.Once the axle is free and resting on something (in retrospect a socket wrench is probably not the best idea. It did work but it is definitely on the “less stable” end of the list of options.) you can gently tap the outer end of the axle with your soft hammer until it starts to move inward. Be very careful on the threaded end; damaging the threads ruins your shaft and they are really expensive.
8.Get back under the car and carefully pull the axle toward the rear differential until it is free of the hub. It isn’t too difficult but it does require some effort and the axle itself is surprisingly heavy.
9.Here is my passenger side rear axle. Note the absolute absence of any kind of grease…
10.Grease the area between the spline and the face of the flange liberally.
11.Apply loc-tite to every bolt you have removed and reinstall using the torque specs above.
12.Go for a click-less test drive!
Attachments
-
 01ff6.jpg9.3 KB · Views: 107
-
 DSCN2417.jpg129.1 KB · Views: 112
-
 DSCN2418.jpg95.7 KB · Views: 117
-
 DSCN2420.jpg89.8 KB · Views: 166
-
 DSCN2421.jpg99.3 KB · Views: 134
-
 DSCN2422.jpg101.8 KB · Views: 150
-
 DSCN2423.jpg134.7 KB · Views: 168
-
 DSCN2425.jpg119.7 KB · Views: 446
-
 DSCN2426.jpg103.7 KB · Views: 217
-
 DSCN2427.jpg105.8 KB · Views: 165
Last edited:

