
Before you begin this or any DIY, remember to take all steps to be safe, use proper tools and safety gear when necessary.
Take your time since this is DIY leaves almost zero room for error. With that said, good luck and don't mess it up
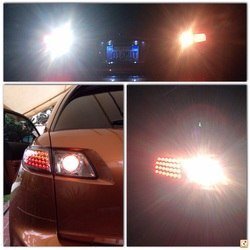
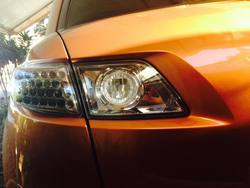
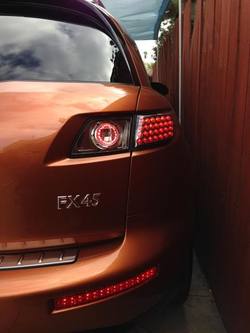
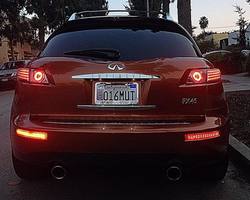
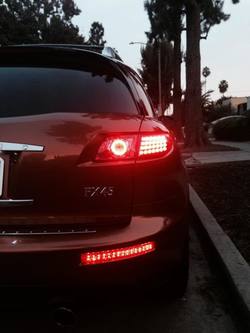
The sole purpose of this mod is to add additional light source in the rear of the FX for better visibility and in some cases improved appearance of the car. If you are like me and feel that the inner tail lights seem like a waste to be used just for reverse light, this write up is for you.
I used my old red inner housing as a donor light to try different ways to make it a clean install, without compromising the integrity and look of the sport version.
The best way to insert the AE inside IMO was by cutting out an opening on the side of the housing, through which I fed the AE in and positioned it in the right way. It has to be twisted towards the license plate (aligned with the flat part of the housing) in order to shine towards the back, instead of in an angle to the side.
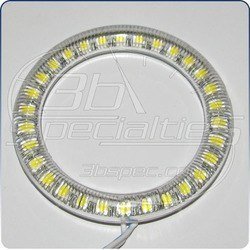
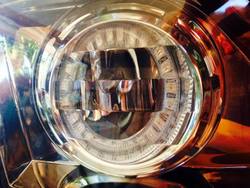
The oval part of the light housing will perfectly fit a 60mm angel eye.
In this mod you will have to:
1. Remove the rear hatch panel, for instructions and tools follow a DIY written by la_fx35 (aka Handy Andy): Hatch Panel Removal
2. Remove the inner tail lights, for instructions and tools follow a DIY written by our admin, Jeff - fxlr8: Tail Reverse Light Removal
3. Cut an opening in each light housing
4. Insert and secure the angel eye inside
5. Add extension wire to supply power to AEs and connectors
6. Test the light and reinstall everything back.
Depending on your manual skills, plan anywhere between 4 - 8 hours to have the project completed.
Tools:
• dremmel
• glue gun
• wire stripper/cutter
• cotton balls
• tweezers
• electrical tape
• 18 gauge wire(s) (black and red or any other 2 color combo to tell “+” from “-“)
• male to female wire connectors x 4 (to allow easy disconnection when in need to remove the housing from the car)
• patience
When done removing the trim panel and the lights begin the project:
Before you begin to cut the housing with the dremmel:
1. Stuff a few cotton balls through the light bulb opening inside of the oval part of the housing. This is to prevent any dust and shavings from cutting the plastic from falling inside of the light, which would be rather tough to get out later, even with a vacuum cleaner etc.
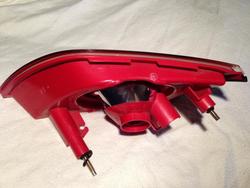
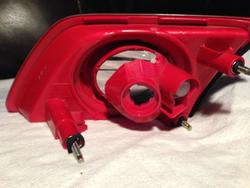
2. Cut out the opening on the side of the light (as pictured in the photo below). The length of the opening will be from the top all the way towards the bottom screw. The with will depend on the thickness of the AE, so adjust that accordingly. It will need to be a bit wider to allow the AE to be slid inside the housing in a slight angle.
3. When the opening is big enough for the AE to slide in easily, feed the wires through the hole in the housing, that’s covered by a clear cap. Depending on the thickness of the wire you might be able to feed it from inside, or if it’s too thick try to drill it a bit. Again make sure the cotton is still there, to avoid dust/shavings to fall inside.
4. Now for the tricky part. You will have to position the AE and twist it inside the housing in the proper position. It should feel secured and "stuck".
5. Apply the glue, using the glue gun around the back of the AE to secure it in place. Do the bottom part first, let it set and cool off, to avoid the glue from spreading, and then finish the top. With AE secured, seal the opening. I used a piece of plastic I had, cut it to the shape of the created opening, put it over, and secured it with glue and then electrical tape to prevent any moisture from getting inside. You can also apply sealer over it.
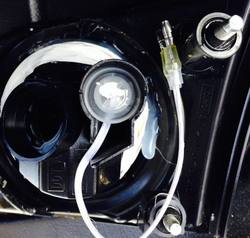
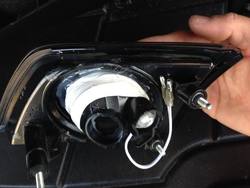
With the housing all done, move to the rear hatch.
6. Feed the wires through the rubber seal. Use any kind of hole poking tool, a nail to make a hole for new wires.
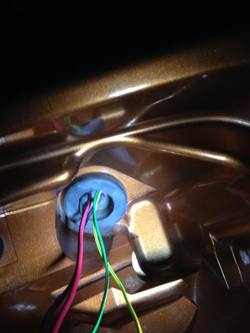
Cut additional wire to go from the housing all the way to the license plate lights on both sides. Tap to the license plate lights and check if the AEs come on when lights are on.
7. Test the connection. If everything is working well, reattach the inner lights to the tail gate, replace the plastic trim cover and enjoy your handy work and extra lights in the rear.
[video=youtube;wbMPX4mpf7c]http://www.youtube.com/watch?v=wbMPX4mpf7c&feature=plcp[/video]
Take your time since this is DIY leaves almost zero room for error. With that said, good luck and don't mess it up
The sole purpose of this mod is to add additional light source in the rear of the FX for better visibility and in some cases improved appearance of the car. If you are like me and feel that the inner tail lights seem like a waste to be used just for reverse light, this write up is for you.
I used my old red inner housing as a donor light to try different ways to make it a clean install, without compromising the integrity and look of the sport version.
The best way to insert the AE inside IMO was by cutting out an opening on the side of the housing, through which I fed the AE in and positioned it in the right way. It has to be twisted towards the license plate (aligned with the flat part of the housing) in order to shine towards the back, instead of in an angle to the side.
The oval part of the light housing will perfectly fit a 60mm angel eye.
In this mod you will have to:
1. Remove the rear hatch panel, for instructions and tools follow a DIY written by la_fx35 (aka Handy Andy): Hatch Panel Removal
2. Remove the inner tail lights, for instructions and tools follow a DIY written by our admin, Jeff - fxlr8: Tail Reverse Light Removal
3. Cut an opening in each light housing
4. Insert and secure the angel eye inside
5. Add extension wire to supply power to AEs and connectors
6. Test the light and reinstall everything back.
Depending on your manual skills, plan anywhere between 4 - 8 hours to have the project completed.
Tools:
• dremmel
• glue gun
• wire stripper/cutter
• cotton balls
• tweezers
• electrical tape
• 18 gauge wire(s) (black and red or any other 2 color combo to tell “+” from “-“)
• male to female wire connectors x 4 (to allow easy disconnection when in need to remove the housing from the car)
• patience
When done removing the trim panel and the lights begin the project:
Before you begin to cut the housing with the dremmel:
1. Stuff a few cotton balls through the light bulb opening inside of the oval part of the housing. This is to prevent any dust and shavings from cutting the plastic from falling inside of the light, which would be rather tough to get out later, even with a vacuum cleaner etc.
2. Cut out the opening on the side of the light (as pictured in the photo below). The length of the opening will be from the top all the way towards the bottom screw. The with will depend on the thickness of the AE, so adjust that accordingly. It will need to be a bit wider to allow the AE to be slid inside the housing in a slight angle.
3. When the opening is big enough for the AE to slide in easily, feed the wires through the hole in the housing, that’s covered by a clear cap. Depending on the thickness of the wire you might be able to feed it from inside, or if it’s too thick try to drill it a bit. Again make sure the cotton is still there, to avoid dust/shavings to fall inside.
4. Now for the tricky part. You will have to position the AE and twist it inside the housing in the proper position. It should feel secured and "stuck".
5. Apply the glue, using the glue gun around the back of the AE to secure it in place. Do the bottom part first, let it set and cool off, to avoid the glue from spreading, and then finish the top. With AE secured, seal the opening. I used a piece of plastic I had, cut it to the shape of the created opening, put it over, and secured it with glue and then electrical tape to prevent any moisture from getting inside. You can also apply sealer over it.
With the housing all done, move to the rear hatch.
6. Feed the wires through the rubber seal. Use any kind of hole poking tool, a nail to make a hole for new wires.
Cut additional wire to go from the housing all the way to the license plate lights on both sides. Tap to the license plate lights and check if the AEs come on when lights are on.
7. Test the connection. If everything is working well, reattach the inner lights to the tail gate, replace the plastic trim cover and enjoy your handy work and extra lights in the rear.
[video=youtube;wbMPX4mpf7c]http://www.youtube.com/watch?v=wbMPX4mpf7c&feature=plcp[/video]