How to get my halo lights to turn on when the car is on?

akachi

Member
Location
NY Queens
Car
2011 FX35 AWD
Name
Matt
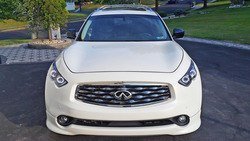
I have an OnEighty custom headlights with halo lights that's tapped into the DRL wire. But I want the halo lights to turn on every time I start the car.
Just like some cars come factory with LEDs and halos that comes on every time they start the car.

Right now, I would switch the control on the knob to turn on the DRL (halos) but I would need to remember to switch it back off when I shut the car off.

I'm not good with electrical but would anyone have an idea?
 
So I would need to fish the wire from the engine bay to the cabin next to the driver side foot pedals where the fuse boxes are?
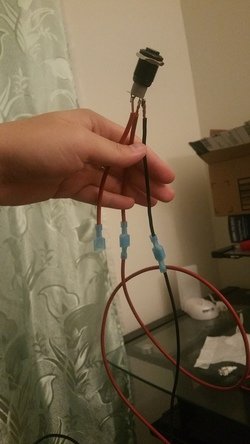
What amp fuse would I need to add for this job?

I was also thinking of adding a switch so I can turn it off and then have it function normally. Is this possible?
Edit: I'm thinking of adding a rocker switch which can turn off the halos that is being connected to ACC from the fuse box while keeping the halos still being tapped into the DRL (for factory setting).
Will this route work and will anything blow since it will be connected to ACC from fuse box as well as being connected to DRL from the headlights?
 
Last edited:
You need to use the same fuse. You just take the fuse that is in use, put "Add a fuse circuit holder" and put the old back fuse back. I'm not sure if you have a fuse box in the engine bay or not, 1st generation does, so you don't really need to run the wire inside, unless you want to add on off switch.

Wait you have the on/off switch inside the cabin, correct? Then you just take the positive wire from there and connect it to "Add a fuse circuit holder".

Here is a video how to install that holder:

 
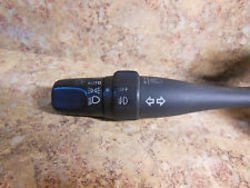
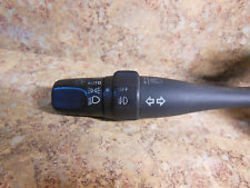
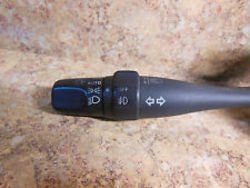
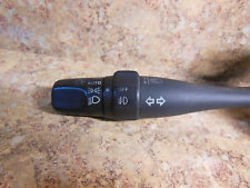
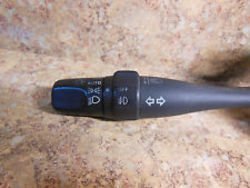
the on/off switch is on the turn signal knob
s-l225.jpg

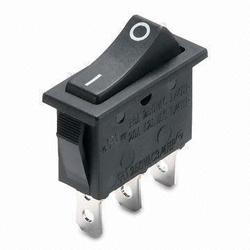
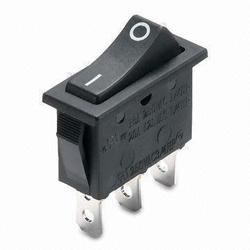
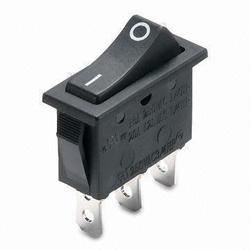
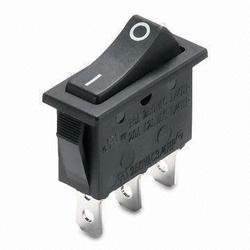
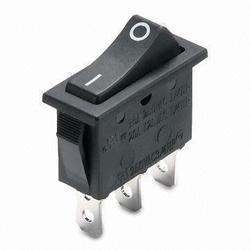
but i want to maybe add this
Rocker-Switch.jpg

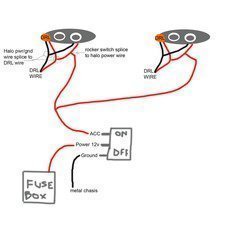
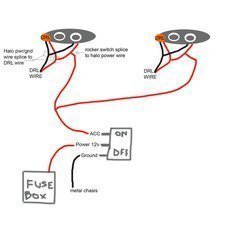
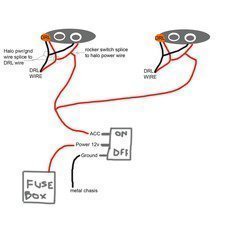
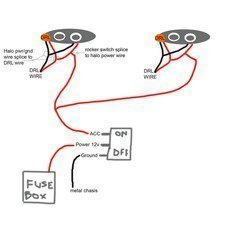
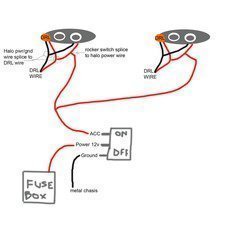
I drew up a diagram. Currently my halos are spliced into DRL. I want to add a switch that will give the halos ACC to turn on everytime the car is on while turning off from the switch will revert back to factory setting(turning on/off from DRL)
halosplice_zpselgay7ys.jpg

Is my diagram correct?
Will this affect anything since there will be 2 power that will be connected to the halos? (1 from DRL and another 1 from ACC)
 

Attachments

  • halosplice_zpselgay7ys.jpg
    halosplice_zpselgay7ys.jpg
    63.5 KB · Views: 179
  • halosplice_zpselgay7ys.jpg
    halosplice_zpselgay7ys.jpg
    63.5 KB · Views: 209
  • halosplice_zpselgay7ys.jpg
    halosplice_zpselgay7ys.jpg
    63.5 KB · Views: 10,516
  • Rocker-Switch.jpg
    Rocker-Switch.jpg
    12.4 KB · Views: 135
  • Rocker-Switch.jpg
    Rocker-Switch.jpg
    12.4 KB · Views: 173
  • Rocker-Switch.jpg
    Rocker-Switch.jpg
    12.4 KB · Views: 146
  • Rocker-Switch.jpg
    Rocker-Switch.jpg
    12.4 KB · Views: 136
  • s-l225.jpg
    s-l225.jpg
    10.1 KB · Views: 189
  • s-l225.jpg
    s-l225.jpg
    10.1 KB · Views: 203
  • s-l225.jpg
    s-l225.jpg
    10.1 KB · Views: 221
  • s-l225.jpg
    s-l225.jpg
    10.1 KB · Views: 193
  • halosplice_zpselgay7ys.jpg
    halosplice_zpselgay7ys.jpg
    63.5 KB · Views: 288
On your diagram, all you need to do is tap the 12V Power wire to any fuse that has power when the car is running will do the job since the LEDs does not take much power. You don't need the power from the DRL.

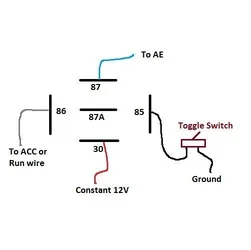
Or you find the ACC wire from the ignition switch and wire it up with a relay like in my post.
 
i guess there's 2 ways to doing this. But you don't think it's going to cause any problems to any electrical components if I splice the ACC wire to the halo which is also connected to the DRL wire?
 
You only need power source from one. Either the DRL, Tap on a fuse that only has power when the car is running, or the ignition switch ACC wire. Any which way you will need to run a wire from the toggle switch to the halos.

I would disconnect the DRL to the halo and power it with fuse tab on a fuse that has power when the car is running. No point to have the halos also power up by the DRL.

If you leave the DRL wire connected to the halos, your toggle switch cannot turn them off since there is constant power going into the halos.
 
The way I would do this is I would find the constant 12V and ACC wire from the ignition switch, and wire up with a relay like my diagram. I would also add a fuse the wire that goes out the halo just to protect them. This way I know exactly where the power source is and I don't depends on the car's circuit that power the fuse you tapped into.
 
If I don't connect the halos to my DRL, then that means the halos won't turn on when DRL/headlights are turned on. I want to keep that function.
While also have the function to keep them turned on/off via ACC with a toggle switch
 
It gets pretty complex if you want to power lights, in this case halos, via two sources, but it's possible with a single pole double throw relay. Like the 5 pin relay la_fx35 suggested above.

However, you want the halos to turn on when you run the car, so even without the rocker switch, the halos are powered on when ACC is active. So, what la_fx35 and zebra555 said above, there is no point in now connected halos to the DRL as well. The halos will be powered on regardless of the DRL. Adding the rocker switch will add the ability to turn off the halos whenever you want. You want a 12v relay to properly wire up the halos to ACC.

I've wired many lights and accessories previously, and I tend to use relays, unless the switch can handle electrical current of the accessory.
 
By the way, don't power lights or accessories using two independent power sources without additional electrical components. It will cause a back feed and bad things will happen.
 
After much thought, I think just tapping the halos to the ACC in the fuse box with the rocker switch. I'll just leave it turn on always and when I'm parked and don't want people to think I'm leaving, I'll just turn it off.

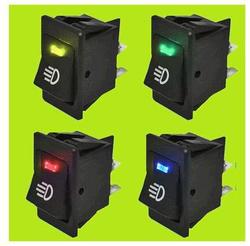
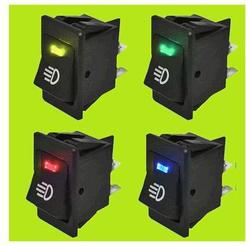
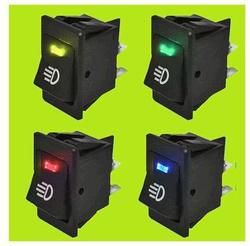
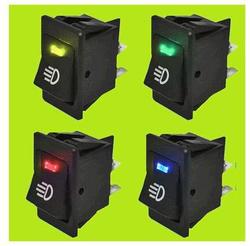
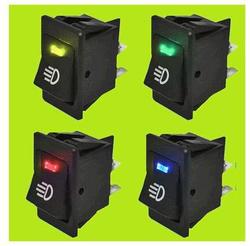
I think I will go with the tapping the fuse ACC route to the rocker switch. Thinking of getting these rocker switch. Will it work?
12V-daytime-running-lights-with-LED-lights-angel-eye-conversion-font-b-switch-b-font-car.jpg
 

Attachments

  • 12V-daytime-running-lights-with-LED-lights-angel-eye-conversion-font-b-switch-b-font-car.jpg
    12V-daytime-running-lights-with-LED-lights-angel-eye-conversion-font-b-switch-b-font-car.jpg
    20.6 KB · Views: 160
  • 12V-daytime-running-lights-with-LED-lights-angel-eye-conversion-font-b-switch-b-font-car.jpg
    12V-daytime-running-lights-with-LED-lights-angel-eye-conversion-font-b-switch-b-font-car.jpg
    20.6 KB · Views: 137
  • 12V-daytime-running-lights-with-LED-lights-angel-eye-conversion-font-b-switch-b-font-car.jpg
    12V-daytime-running-lights-with-LED-lights-angel-eye-conversion-font-b-switch-b-font-car.jpg
    20.6 KB · Views: 125
  • 12V-daytime-running-lights-with-LED-lights-angel-eye-conversion-font-b-switch-b-font-car.jpg
    12V-daytime-running-lights-with-LED-lights-angel-eye-conversion-font-b-switch-b-font-car.jpg
    20.6 KB · Views: 112
The halos will turn on and off with ACC.

Yeah, those rocker switches will work fine. In your car, just measure out where you going to put the switch and compare those dimensions to the manufacture's rocker switch specs.
I have 4 halo LEDs. I measured out their current draw, it was less than 1 amp for all 4. So, assuming they are with similar spec to yours, all you'll need is a rocker switch that will support at least 1 amp. You won't need a relay.
 
Thanks for all your help, zebra555, la_fx35 and kanedean! Looks like this will be a weekend project
 
I just did the install yesterday.
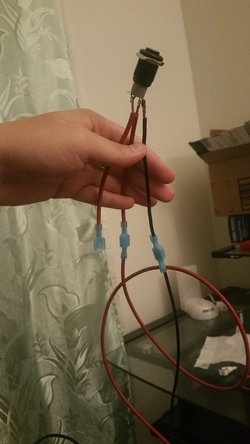
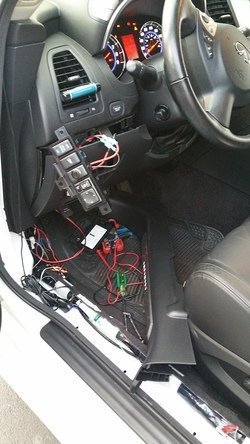
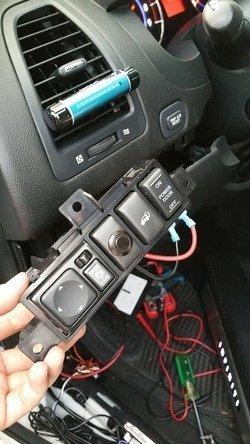
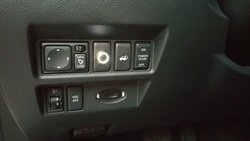
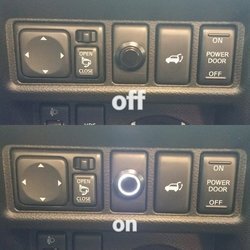
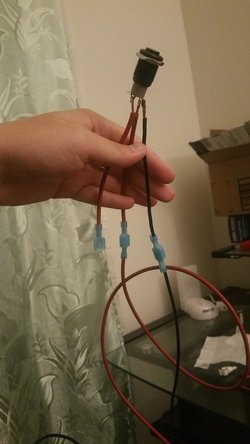
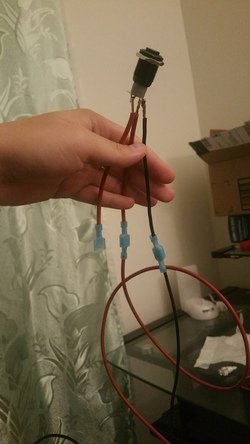
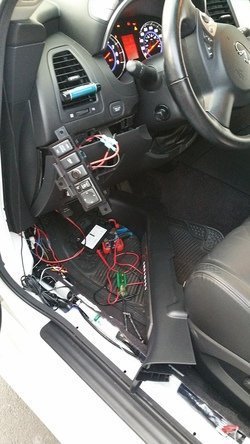
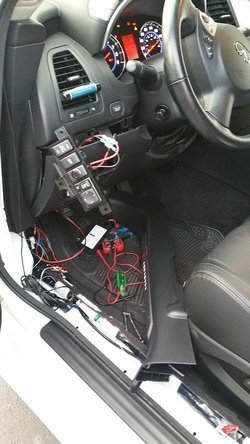
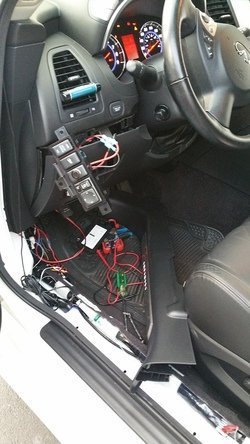
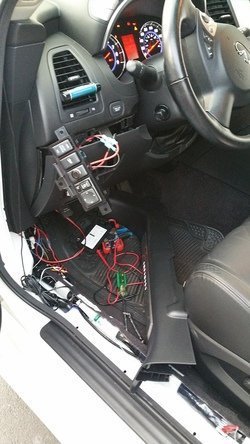
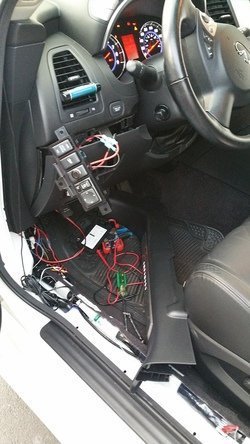
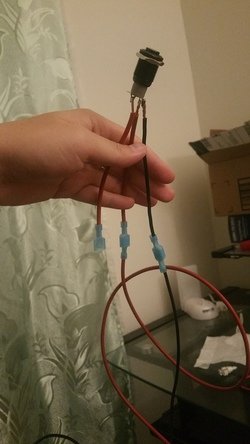
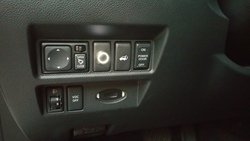
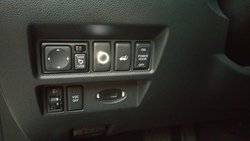
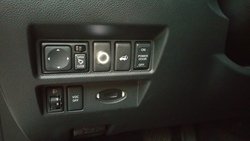
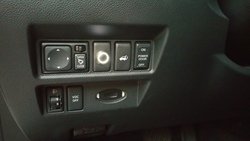
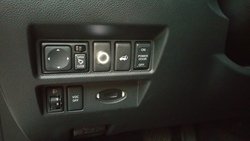
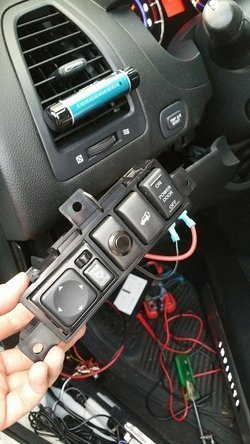
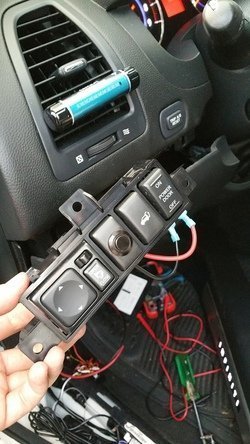
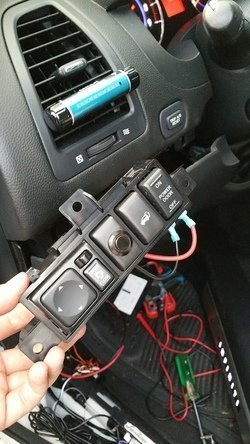
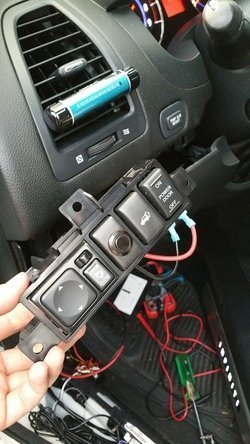
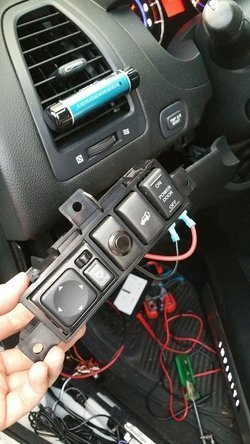
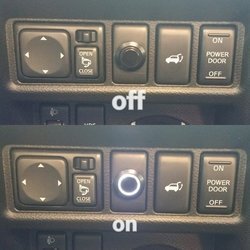
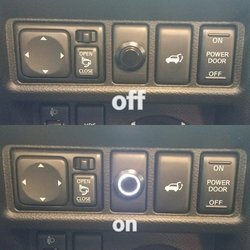
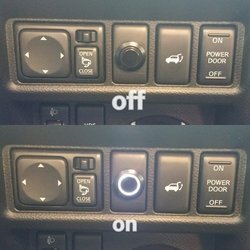
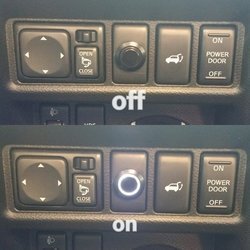
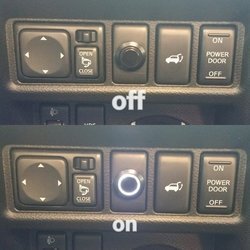
I ended buying a push switch button that lights up white circle led which matches my halo lights. I have an empty/unused button under my steering column that I used to put the button.
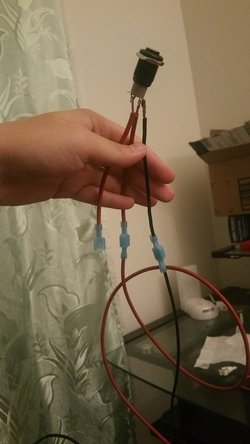
The install went pretty well. It took about 2 hours, most of it was making sure everything was nicely tucked and making sure connectivity was secure.
Now the halo lights will turn on automatically whenever the car is on. And I have the function to turn it off when I don't want people to know I'm in the car while I'm parked.

I added a shrink tube where I soldered after I took this photo.
20160718_000518_zps7rzshf9f.jpg
20160720_201811_zpsi5eucza3.jpg
20160720_201825_zpso8touyek.jpg
20160720_202655_zpsfxweosif.jpg
PhotoGrid_1469106336604_zpset7hqgfx.jpg
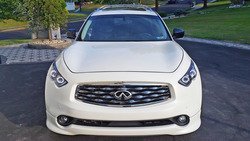
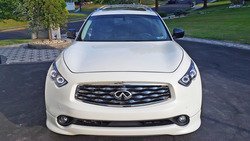
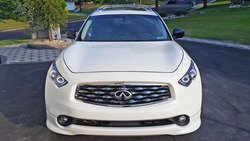
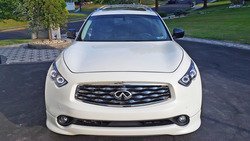
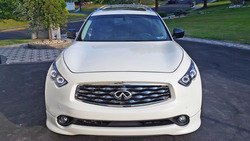
frontendfx35_zpse9fd0tnv.jpg

Want to give thanks to you guys for helping me with the wiring!!
 

Attachments

  • 20160718_000518_zps7rzshf9f.jpg
    20160718_000518_zps7rzshf9f.jpg
    84.1 KB · Views: 154
  • 20160718_000518_zps7rzshf9f.jpg
    20160718_000518_zps7rzshf9f.jpg
    84.1 KB · Views: 190
  • 20160718_000518_zps7rzshf9f.jpg
    20160718_000518_zps7rzshf9f.jpg
    84.1 KB · Views: 167
  • 20160720_201811_zpsi5eucza3.jpg
    20160720_201811_zpsi5eucza3.jpg
    145.2 KB · Views: 187
  • 20160720_201811_zpsi5eucza3.jpg
    20160720_201811_zpsi5eucza3.jpg
    145.2 KB · Views: 177
  • 20160720_201811_zpsi5eucza3.jpg
    20160720_201811_zpsi5eucza3.jpg
    145.2 KB · Views: 205
  • 20160720_201811_zpsi5eucza3.jpg
    20160720_201811_zpsi5eucza3.jpg
    145.2 KB · Views: 234
  • 20160720_201811_zpsi5eucza3.jpg
    20160720_201811_zpsi5eucza3.jpg
    145.2 KB · Views: 147
  • 20160718_000518_zps7rzshf9f.jpg
    20160718_000518_zps7rzshf9f.jpg
    84.1 KB · Views: 194
  • 20160718_000518_zps7rzshf9f.jpg
    20160718_000518_zps7rzshf9f.jpg
    84.1 KB · Views: 221
  • 20160720_202655_zpsfxweosif.jpg
    20160720_202655_zpsfxweosif.jpg
    82.1 KB · Views: 144
  • 20160720_202655_zpsfxweosif.jpg
    20160720_202655_zpsfxweosif.jpg
    82.1 KB · Views: 208
  • 20160720_202655_zpsfxweosif.jpg
    20160720_202655_zpsfxweosif.jpg
    82.1 KB · Views: 160
  • 20160720_202655_zpsfxweosif.jpg
    20160720_202655_zpsfxweosif.jpg
    82.1 KB · Views: 227
  • 20160720_202655_zpsfxweosif.jpg
    20160720_202655_zpsfxweosif.jpg
    82.1 KB · Views: 166
  • 20160720_201825_zpso8touyek.jpg
    20160720_201825_zpso8touyek.jpg
    153.1 KB · Views: 169
  • 20160720_201825_zpso8touyek.jpg
    20160720_201825_zpso8touyek.jpg
    153.1 KB · Views: 155
  • 20160720_201825_zpso8touyek.jpg
    20160720_201825_zpso8touyek.jpg
    153.1 KB · Views: 192
  • 20160720_201825_zpso8touyek.jpg
    20160720_201825_zpso8touyek.jpg
    153.1 KB · Views: 184
  • 20160720_201825_zpso8touyek.jpg
    20160720_201825_zpso8touyek.jpg
    153.1 KB · Views: 157
  • frontendfx35_zpse9fd0tnv.jpg
    frontendfx35_zpse9fd0tnv.jpg
    159.6 KB · Views: 156
  • frontendfx35_zpse9fd0tnv.jpg
    frontendfx35_zpse9fd0tnv.jpg
    159.6 KB · Views: 145
  • frontendfx35_zpse9fd0tnv.jpg
    frontendfx35_zpse9fd0tnv.jpg
    159.6 KB · Views: 216
  • frontendfx35_zpse9fd0tnv.jpg
    frontendfx35_zpse9fd0tnv.jpg
    159.6 KB · Views: 149
  • PhotoGrid_1469106336604_zpset7hqgfx.jpg
    PhotoGrid_1469106336604_zpset7hqgfx.jpg
    157.9 KB · Views: 162
  • PhotoGrid_1469106336604_zpset7hqgfx.jpg
    PhotoGrid_1469106336604_zpset7hqgfx.jpg
    157.9 KB · Views: 145
  • frontendfx35_zpse9fd0tnv.jpg
    frontendfx35_zpse9fd0tnv.jpg
    159.6 KB · Views: 269
  • PhotoGrid_1469106336604_zpset7hqgfx.jpg
    PhotoGrid_1469106336604_zpset7hqgfx.jpg
    157.9 KB · Views: 159
  • PhotoGrid_1469106336604_zpset7hqgfx.jpg
    PhotoGrid_1469106336604_zpset7hqgfx.jpg
    157.9 KB · Views: 173
  • PhotoGrid_1469106336604_zpset7hqgfx.jpg
    PhotoGrid_1469106336604_zpset7hqgfx.jpg
    157.9 KB · Views: 159
Last edited:
Back
Top