

Perform this DIY at your own risk.
Please DO NOT have open flames near the gas tank and work in a well ventilated area.
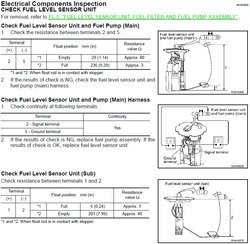
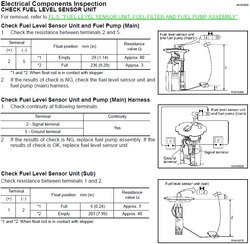
As your FX age, the gas gauge gradually become less accurate to the amount of gas left in the tank.
This DIY will fix the gas gauge problem.
Update 07/12/11:
I would recommend to do this fix when your tank is close to empty to avoid
fuel continually spraying out of the fuel line as you disconnect it from pump.
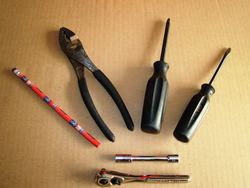
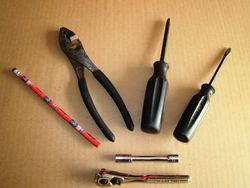
Tools: Pencil with eraser top, pliers, screw drivers (philips and flat), 8 mm socket and ratchet.
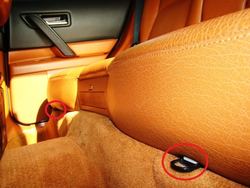
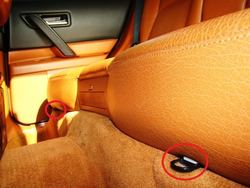
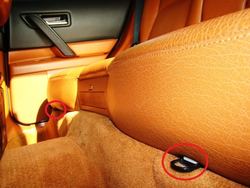
To begin, remove the rear seat by pulling on the black ring at the bottom edge of the seat and
lift the seat. Remove the seat and the flimsy insulation sheet.
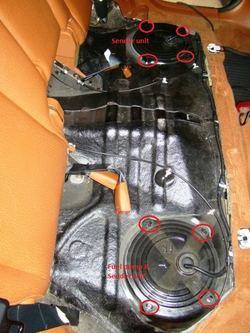
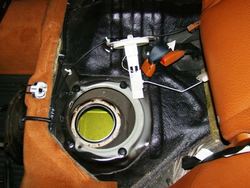
To remove the access door to the gas pump assembly and sender, use a philips screw driver and
turn the black plastic locks in the direction imprinted on the lock.
I find using a pliers is much easier than a screw driver
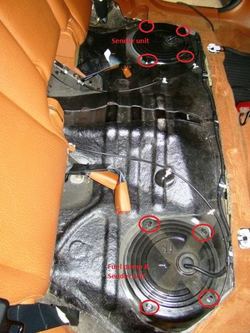
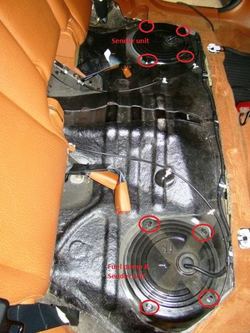
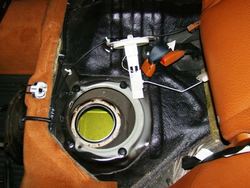
Start with the sender unit located on the driver side rear seat.
Undo the six 8 mm bolts, unplug the electrical connector,
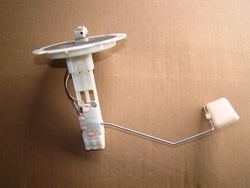
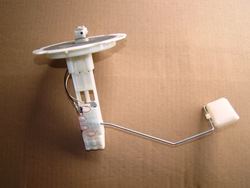
remove the fuel sender retainer ring and lift the send unit out of the tank.
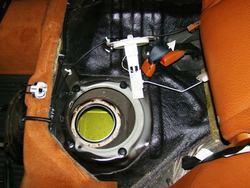
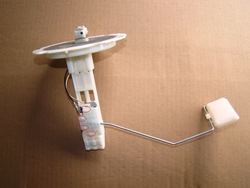
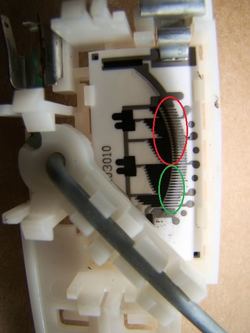
Use a flat head screw driver and gently pry on the hooks to expose the part that needs to be cleaned.
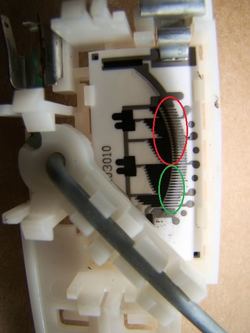
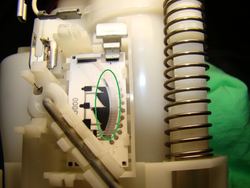
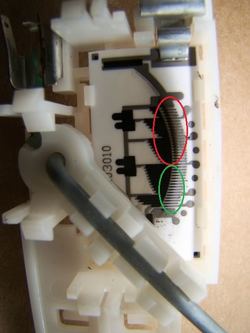
In this pic the part in the red circle is dirty. The part in the green circle has already been cleaned.
To clean, using the eraser, gently rub the black deposit off the silver leads.
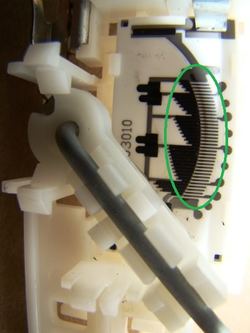
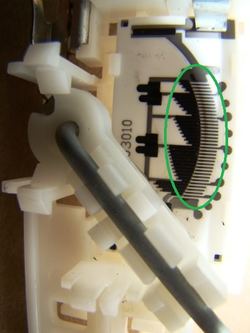
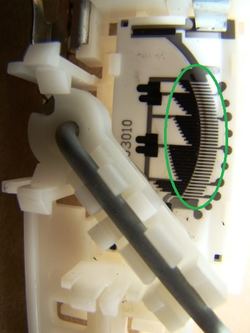
All clean up. Move the floater arm to the center and pop the plastic cover back on.
Insert the sender unit back into tank, bolt the sender retainer ring back, plug
the electrical connector back and put the access door back.
Turn the locks in the opposite direction of the imprinted arrow to lock the
access door in place. I find using a pliers is much easier to turn the locks back.
Now start to work on the send unit that is attached to the fuel pump.
The fuel pump is located on the passenger side rear seat.
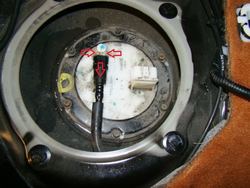
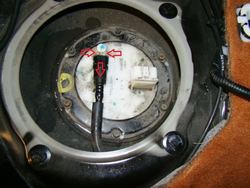
To removing the fuel line, squeeze the white tab and pull on the fuel line to separate them.
There will be a little squirt of fuel when they become apart. Have some rags handy!
Update 07/12/11:
If your tank is full, you may need a cup/pan to catch the fuel as it will continually dripping
from the disconnected fuel line.
Unplug the electrical connector. Undo the six 8 mm bolts to remove the fuel pump retainer ring.
Note, when you undo the last couple of bolts, hold the retainer ring as the fuel pump will try to pop out of the tank.
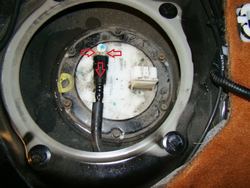
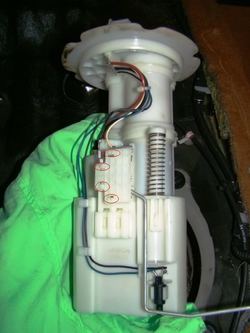
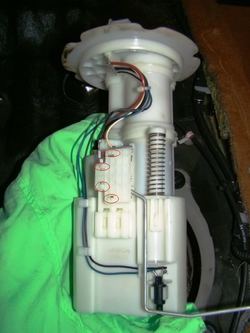
Carefully lift and work the pump assembly out of the tank.
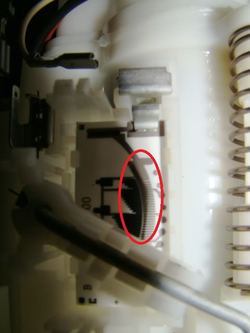
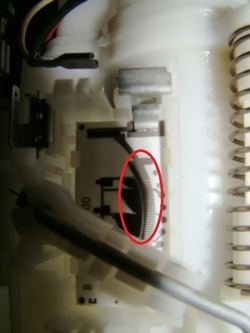
Use a flat head screw driver and gently pry on the hooks to expose the part that needs to be cleaned.
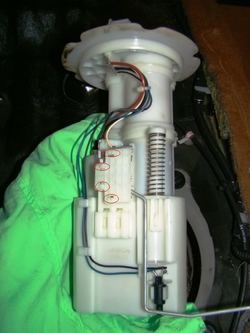
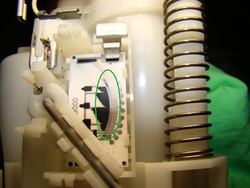
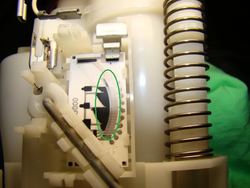
Dirty sender leads. Again using the eraser, gently rub the black deposit off the silver leads.
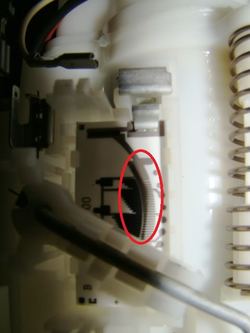
All clean up. Move the floater arm to the center and pop the plastic cover back on.
Insert the sender unit back into tank, bolt the sender retainer ring back, plug
the electrical connector back and put the access door back.
Turn the locks in the opposite direction of the imprinted arrow to lock the
access door in place. I find using a pliers is much easier to turn the locks back.
Please DO NOT have open flames near the gas tank and work in a well ventilated area.
As your FX age, the gas gauge gradually become less accurate to the amount of gas left in the tank.
This DIY will fix the gas gauge problem.
Update 07/12/11:
I would recommend to do this fix when your tank is close to empty to avoid
fuel continually spraying out of the fuel line as you disconnect it from pump.
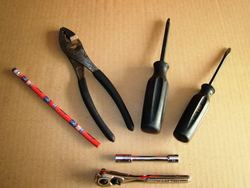
Tools: Pencil with eraser top, pliers, screw drivers (philips and flat), 8 mm socket and ratchet.
To begin, remove the rear seat by pulling on the black ring at the bottom edge of the seat and
lift the seat. Remove the seat and the flimsy insulation sheet.
To remove the access door to the gas pump assembly and sender, use a philips screw driver and
turn the black plastic locks in the direction imprinted on the lock.
I find using a pliers is much easier than a screw driver
Start with the sender unit located on the driver side rear seat.
Undo the six 8 mm bolts, unplug the electrical connector,
remove the fuel sender retainer ring and lift the send unit out of the tank.
Use a flat head screw driver and gently pry on the hooks to expose the part that needs to be cleaned.
In this pic the part in the red circle is dirty. The part in the green circle has already been cleaned.
To clean, using the eraser, gently rub the black deposit off the silver leads.
All clean up. Move the floater arm to the center and pop the plastic cover back on.
Insert the sender unit back into tank, bolt the sender retainer ring back, plug
the electrical connector back and put the access door back.
Turn the locks in the opposite direction of the imprinted arrow to lock the
access door in place. I find using a pliers is much easier to turn the locks back.
Now start to work on the send unit that is attached to the fuel pump.
The fuel pump is located on the passenger side rear seat.
To removing the fuel line, squeeze the white tab and pull on the fuel line to separate them.
There will be a little squirt of fuel when they become apart. Have some rags handy!
Update 07/12/11:
If your tank is full, you may need a cup/pan to catch the fuel as it will continually dripping
from the disconnected fuel line.
Unplug the electrical connector. Undo the six 8 mm bolts to remove the fuel pump retainer ring.
Note, when you undo the last couple of bolts, hold the retainer ring as the fuel pump will try to pop out of the tank.
Carefully lift and work the pump assembly out of the tank.
Use a flat head screw driver and gently pry on the hooks to expose the part that needs to be cleaned.
Dirty sender leads. Again using the eraser, gently rub the black deposit off the silver leads.
All clean up. Move the floater arm to the center and pop the plastic cover back on.
Insert the sender unit back into tank, bolt the sender retainer ring back, plug
the electrical connector back and put the access door back.
Turn the locks in the opposite direction of the imprinted arrow to lock the
access door in place. I find using a pliers is much easier to turn the locks back.
Attachments
-
 001.jpg46.6 KB · Views: 532
 -
 002.jpg65.5 KB · Views: 632
 -
 003.jpg69.4 KB · Views: 2,440
 -
 001.jpg46.6 KB · Views: 604
 -
 004.jpg64.6 KB · Views: 573
 -
 002.jpg65.5 KB · Views: 586
 -
 005.jpg36.2 KB · Views: 603
 -
 003.jpg69.4 KB · Views: 634
 -
 006.jpg33.6 KB · Views: 543
 -
 004.jpg64.6 KB · Views: 526
 -
 005.jpg36.2 KB · Views: 534
 -
 007.jpg32.8 KB · Views: 583
 -
 006.jpg33.6 KB · Views: 610
 -
 008.jpg60.7 KB · Views: 1,023
 -
 007.jpg32.8 KB · Views: 487
 -
 009.jpg43.5 KB · Views: 704
 -
 008.jpg60.7 KB · Views: 547
 -
 009.jpg43.5 KB · Views: 559
 -
 010.jpg26.5 KB · Views: 548
 -
 010.jpg26.5 KB · Views: 570
 -
 011.jpg40.9 KB · Views: 604
 -
 011.jpg40.9 KB · Views: 542
 -
 FuelGaugeDiag_zpsc23b5c05.jpg135.4 KB · Views: 608
 -
 FuelGaugeDiag_zpsc23b5c05.jpg135.4 KB · Views: 507
Last edited:


