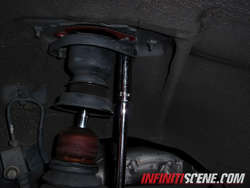

-----------------------------------------
IF YOU USE AND LIKE THIS DIY, PLEASE +1
-----------------------------------------
2003-2008 FX35 / FX45 BC Coilover InstallIF YOU USE AND LIKE THIS DIY, PLEASE +1
-----------------------------------------
TOOLS:
JACK
JACK STANDS
SOCKET WRENCH
SOCKETS (12MM, 14MM, 17MM, 19MM, 22MM)
DEEP OFFSET BOX END WRENCH'S
ALLEN WRENCH (7/32)
BREAKER BAR
TORQUE WRENCH
VISE GRIPS
ADJUSTABLE WRENCH
SAFETY:
ALWAYS USE QUALITY JACKSTANDS WHEN WORKING UNDER YOUR VEHICLE.
NEVER WEAR LOOSE FITTED CLOTHING AROUND A RUNNING MOTOR.
ALWAYS WEAR SAFETY GLASSES.
PLEASE STAY SAFE.
-------------------------------------------------------------------------------------------------------------------------------------------
FRONT STRUT ASSEMBLY REMOVAL
1. RAISE YOUR VEHICLE AND LOWER IT ONTO JACK STANDS, NOW REMOVE YOUR WHEELS.
2. REMOVE THE BRAKE HOSE LOCK PLATE.
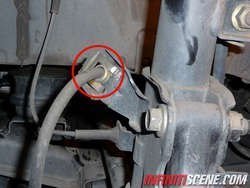
3. REMOVE THE CALIPERS USING A 14MM SOCKET. MOVE THE CALIPERS TO THE OPPOSITE SIDE OF THE WHEEL WELL AND REST ON THE FLOOR. (HANG THE CALIPER IF YOUR CAR IS RAISED ON A LIFT).
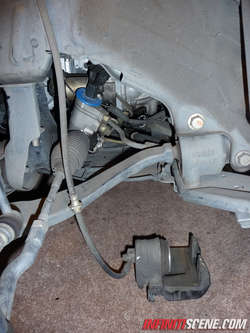
4. (OPTIONAL STEP) REMOVE THE CALIPER BRACKET WITH A 19MM SOCKET AND REMOVE THE ROTORS.
5. CAREFULLY REMOVE THE WHEEL SENSOR LINE FROM THE STRUT.
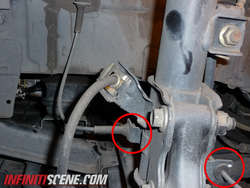
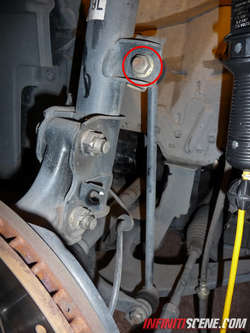
6. USE A 17MM SOCKET AND REMOVE THIS UPPER NUT, SLIDE OUT THE STABILIZER BAR. (THE BOLT MAY NOT WANT TO COME OUT BUT YOU CAN REMOVE THIS LATER WHEN YOU REMOVE THE STRUT ASSEMBLY).
7. USE A JACK AND SUPPORT THE STEERING KNUCKLE.
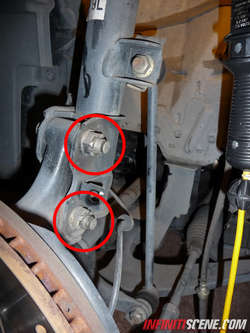
8. REMOVE THE TWO LOWER STRUT ASSEMBLY BOLTS WITH A 22MM SOCKET.
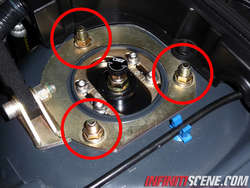
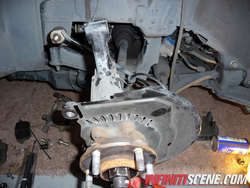
9. IN THE ENGINE BAY, REMOVE THE THREE 14MM NUTS AND DROP THE STRUT ASSEMBLY.
INSTALL
1. PLACE THE STRUT SPACER ON TOP OF THE NEW STRUT ASSEMBLY.
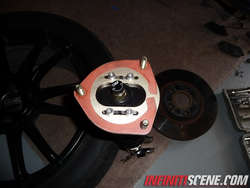
2. PUT THE STRUT ASSEMBLY INTO THE TOP THREE HOLES, USE THE NEW NUTS AND TIGHTEN TO 35 FT/LBS.
3. WITH THE JACK UNDER THE STEERING KNUCKLE LIFT THE LOWER ARM SO THAT IT ALIGNS WITH THE LOWER PART OF THE STRUT ASSEMBLY. INSERT THE BOLTS AND NUTS AND TIGHTEN WITH 22MM SOCKET TO 134 FT/LBS.
4. REINSTALL THE STABILIZER BAR (17MM – 75 FT/LBS).
5. INSTALL THE ROTOR, CALIPER BRACKET, AND CALIPER.
6. REATTACH THE WHEEL SENSOR LINE TO THE STRUT AND ALSO REATTACH THE BRAKE HOSE AND THE BRAKE HOSE LOCK PLATE.
7. CHECK YOUR WORK AND REINSTALL YOUR WHEELS.
8. DROP YOU CAR AND YOU ARE DONE.
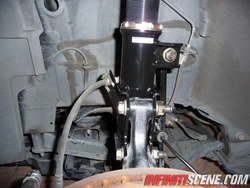
REAR SHOCK / SPRING REMOVAL AND INSTALL
1. RAISE THE REAR AND PLACE ON JACKSTANDS
2. REMOVE THE WHEELS.
3. SUPPORT THE REAR LOWER LINK WITH A JACK AND REMOVE THE 17MM NUT.
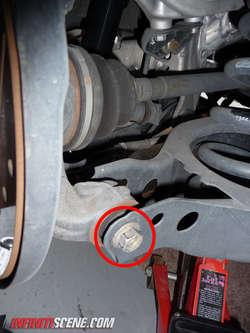
4. LOWER THE JACK AND REMOVE THE SPRING, INCLUDING THE UPPER AND LOWER RUBBER SEAT.
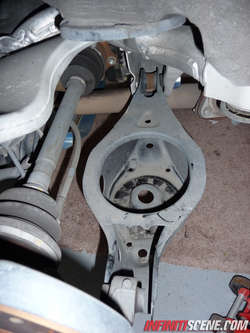
5. RETAIN THE LOWER RUBBER SEAT AND PLACE IT ON THE NEW SPRING.
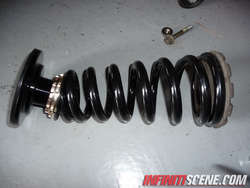
6. INSERT THE NEW ADJUSTABLE SPRING INTO THE LOWER LINK; RAISE THE JACK UNDER THE LOWER LINK WHILE ALIGNING THE UPPER PART OF THE SPRING ASSEMBLY WITH THE TOP.
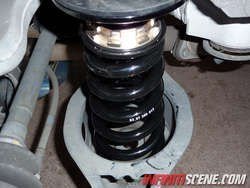
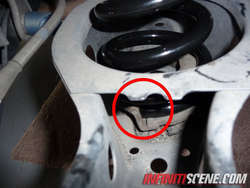
7. INSTALL THE BOLT NUT COMBO AND TIGHTEN TO 77 FT/LBS, USING A 17MM SOCKET.
8. REMOVE THE TWO 12MM NUTS ON THE MOUNTING BRACKET OF THE UPPER REAR SHOCK.
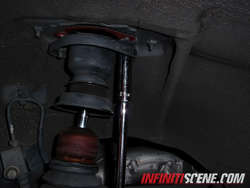
9. REMOVE THE LOWER SHOCK NUT/BOLT WITH A 17MM SOCKET.
10. REMOVE THE OLD SHOCK.
11. WE NOW HAVE TO REMOVE THE MOUNTING BRACKET FROM THE OLD SHOCK; I DID NOT HAVE THE PROPER TOOL FOR THE 19MM NUT SO I USED VISE GRIPS. VISE GRIPS TO GRIP THE NUT AND A 7/32 ALLEN WRENCH. (DEEP OFFSET BOX END WRENCH WOULD OF CAME IN HANDY).
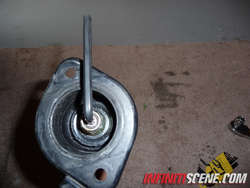
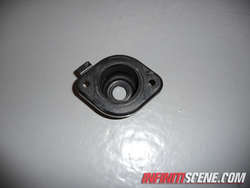
***PLEASE TAKE NOTE OF THE METAL TAB ON THE UPPER SHOCK MOUNT PICTURED ABOVE. THIS TAB MUST FACE OUTWARDS WHEN ON THE CAR, SO MOUNT ACCORDINGLY ON YOUR NEW SHOCK.***
12. TAKE THE NEW SHOCK AND ATTACH THE SUPPLIED BUSHINGS AND OLD BRACKET USING A 19MM SOCKET (OR VISE GRIPS) AND THE SUPPLIED ALLEN WRENCH.
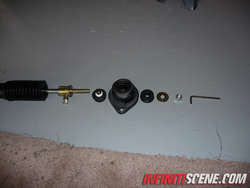
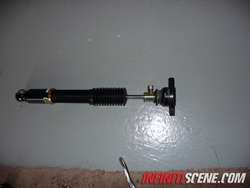
13. INSERT THE NEW SHOCK ASSEMBLY INTO THE LOWER MOUNT AND COMPRESS THE SPRING SO YOU CAN INSTALL IT ONTO THE UPPER MOUNT (MAKE SURE YOU HAVE THE UPPER PAPER TYPE SEAL INSTALLED). THE LOWER MOUNT NUT AND BOLT USES A 17MM SOCKET AND THE UPPER USES A 12MM SOCKET. TIGHTEN THE LOWER TO 66 FT/LBS AND UPPER TWO NUTS TO 22 FT/LBS.
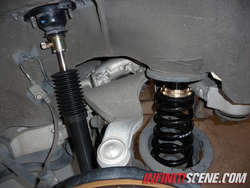
14. REINSPECT AND YOU ARE FINISHED, INSTALL THE WHEELS AND DROP THE CAR.
-------------------------------------------------------------------------------------------------------------------------------------------