
06FX35
Member
- Location
- Rhode Island
- Car
- 2006 FX35 AWD
Just replaced the front hub bearing assembly on my 2006 FX35 AWD. Here's the write up for the technically inclined.
Basic Tools
Car Jack
Jack Stand
1/4 inch ratchet driver
1/2 inch ratchet driver
1/2 inch drive extension
14mm socket
17mm socket and combo wrench
19mm socket and combo wrench
22mm socket and combo wrench
Plier
C-Clamp - to compress the brake pistons back in to reinsall the brake pads.
Hammer
PB Blaster or similar rust busters
Breaker bar
Rope or anything to tie something
Contingency (Plan B) Tools
5mm Drill bit
6mm Plug tap
Vise grip
Electric Drill
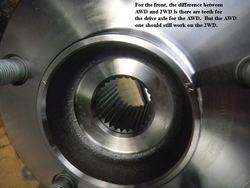
Here's a walk around of the front hub bearing assembly to get familiar with it (from now on will be referred to as FHBA):
Notice the orientation of what's up and what's down. You'll know why later on.
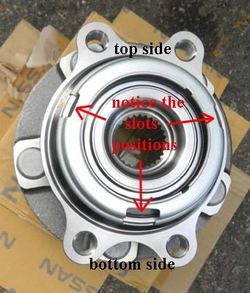
Side view of the FHBA
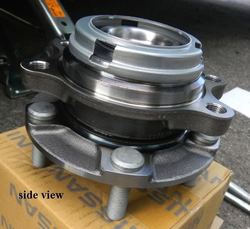
Outward view of the FHBA
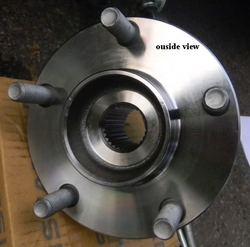
Close up of the FHBA
This is a must to have for this project. PB Blaster has been the best that I have ever used in breaking loose any rusted parts.
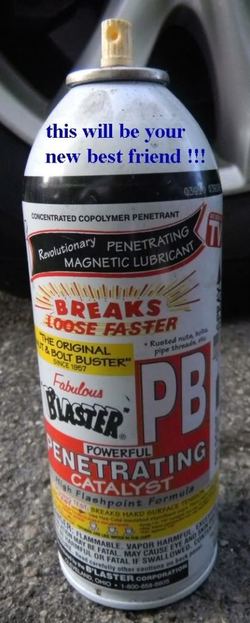
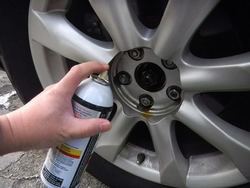
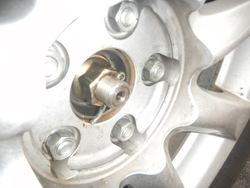
Prop open the wheel center cap and start spraying the PB Blaster right away. The more time it has to soak in the better.
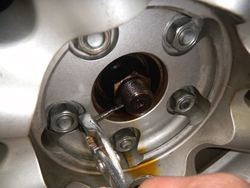
Straighten and remove the locking pin with a plier.
At this point do not jack up the truck yet. You gonna need the friction on the tire to loosen the hub nut.
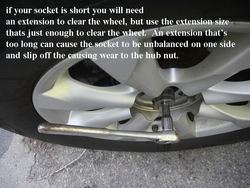
Find yourself a nice breaker bar. The longer the easier it will be on your back.
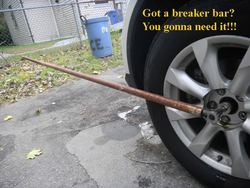
This will bound to happen so make sure you have a back-up. Rachet with moving parts in the head is not ideal for this big job
so I recommend using a fixed-head rachet.
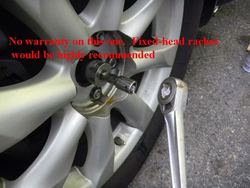
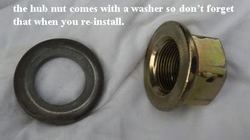
Once initially loose, the hub lug should screw out pretty easily. Don't forget the washer with it.
Now jack up the truck just enough to not put too much weight on the wheel and loosen the lug nuts.
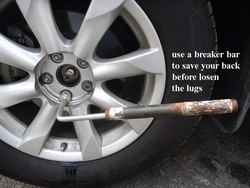
and once all lugs are loosen, the jack can be fully lifted to give enough room for a jack stand. Once the stand is in place
lower the jack a little bit to firmly rest the weight of the truck on both the stand and the jack itself.
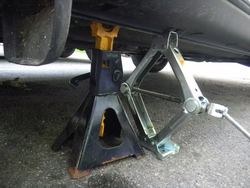
Now the brake and rotor are ready to come off.
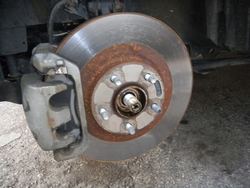
As you can see, the speed sensor is pretty rusted out.
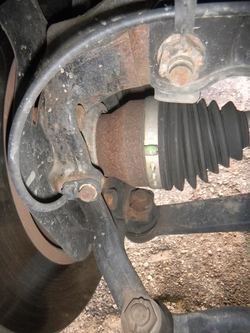
so give it lots of PB Blaster treatment
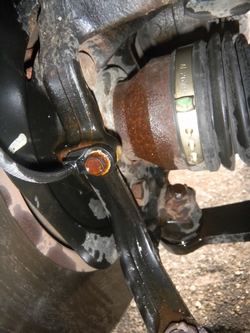
while you are at it, spray some on the brake bracket bolts as well.
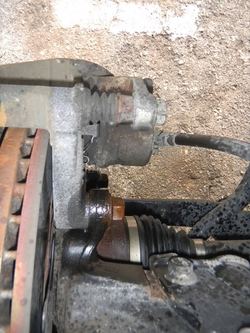
Using a half inch driver and a hammer, tap the end of the driver to loosen the bolts.
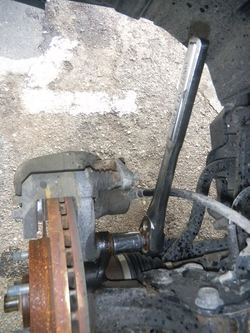
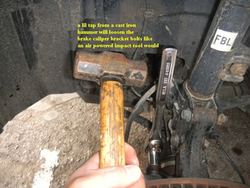
Once the brake bracket bolts are loose, don't remove them all the way, loosen the brake caliper bolts first.
You'll need these off as well to re-install the pads back on later.
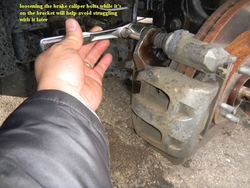
Once removed, tie the brake assembly onto the spring to keep it out of the way.
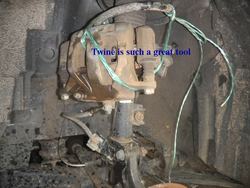
Here's a back shot of the rear of the hub.
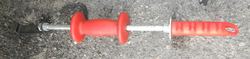
If you have this, use it. A sliding hammer.
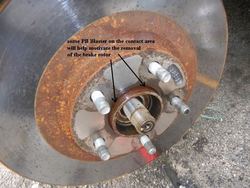
Spray some PB Blaster onto the contact area of the brake rotor and FHBA and let it stand for several minutes.
After several slides of the hammer the rotor comes off. Now you are ready to work on the FHBA.
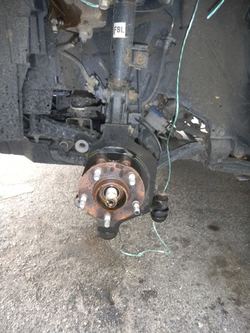
Spray liberal amount of PB Blaster on the bolts of the FHBA and let it sit for a good 5 to 10 min.
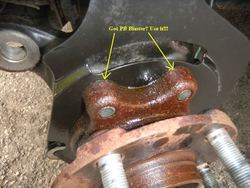
Start loosening the FHBA bolts. Using a hammer to tap the end of the rachet will
help more than trying to put your own muscle force on it. They are pretty stiff, but not as bad as the hub lug nut.
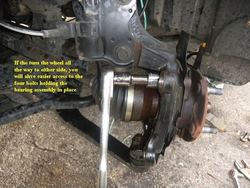
Once all the bolts comes off, use the sliding hammer to work on the FHBA.
Alternate from one side to the other and working around the edges.
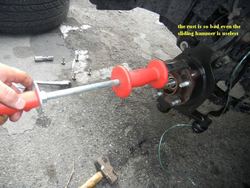
After a good 20 minute on the sliding hammer I realized it was a total waste of time.
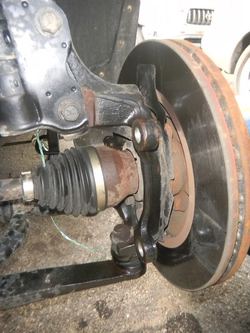
The only way to dislodge this thing is from the back side. Remove the entire hub from the shock.
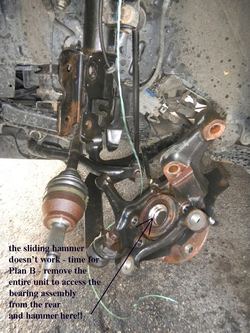
Took only three good solid hits with a cast iron hammer to get the thing loose.
I have came to a conclusion that sliding hammer is only good for dents on body panels.
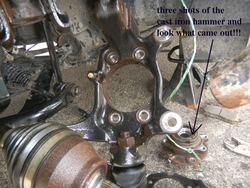
The new FHBA goes in.
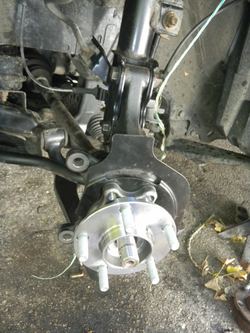
Remember what I said about the up and down side? Here's why.
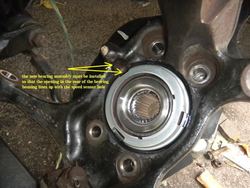
If you installed it upside down, the speed sensor won't go in all the way.
And you'll be bitchin' at yourself for being so stupid like I did.
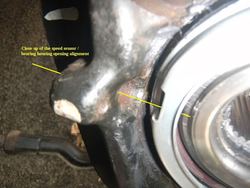
Next up...damn broken speed sensor bolt!!! I can't believe Infiniti used such a poor grade metal for this bolt!!!
Probably a grade 5 or lower. It a 10mm head but only a 6mm shaft. Formula for a catastrophy when rust comes to play.
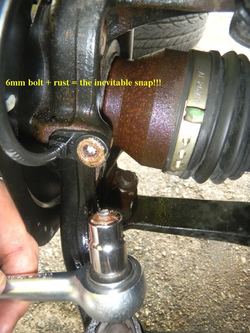
The speed sensor comes out, but the broken nuts becomes a pain in the you know what.
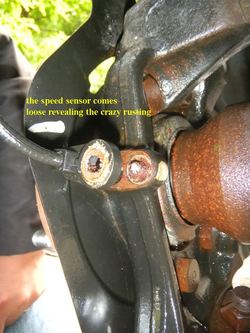
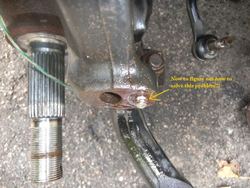
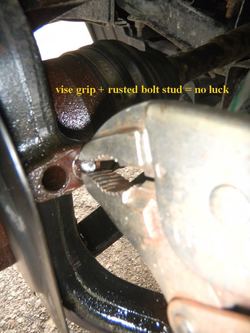
Vise grip might work...not!!!! The quality of the metal use on this thing is so poor
the edge of the leftover piece just crumbled when I twisted the vise grip. Also tried a bolt extractor. Useless on rusted metal.
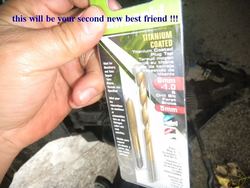
After an hour break and thinking it over again, I went shopping and found this!!! It's like wow! The greatest invention ever!!!
The speed sensor nut is exactly this size.
Use the drill to drill out the stuck bolt as much as you can but be careful not to damage the side of the hole.
Then use a vise grip to firmly hold the tap.
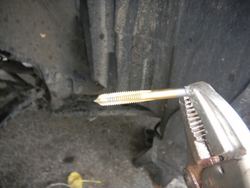
Start screwing the tap into the drilled hole. Be careful, when you start to feel resistence, unscrew it back out and remove
any metal filing on the tap head. Repeat until you get enough depth for a new screw. This will re-create the thread
that should fit any M6-5mm bolt.
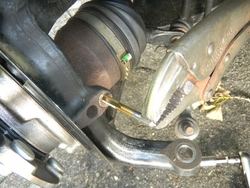
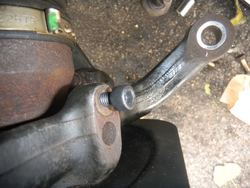
Instead of using the same grade (OEM bolt) I found this Allen bolt that's at least a grade 8.
Works like a charm. No worries for future removal.
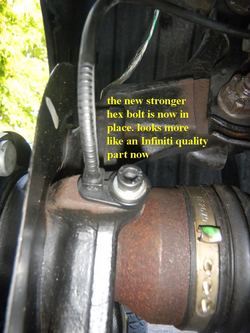
The speed sensor is now in place!!!
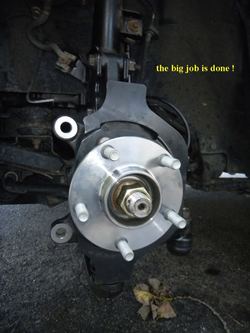
Start re-assemble things back on and don't forget that washer with the hub lug.
Before using the C-Clamp to compress the brake pistons, make sure you loosen the brake fluid reservoir
cap and slowly compress the pistons. Opening the reservoir cap will ease the pressure a bit and
minimize the risk of damaging the ABS controller. Bleeding the brake shouldn't be necessary
since you haven't introduce any air to the line. Make sure close the brake reservoir cap before pumping the brake.
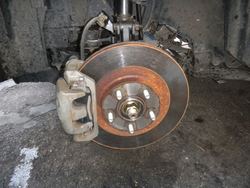
Lower the truck and tighten the wheel lugs and the hub lug. Don't forget the locking pin and you're good for another 80 - 90K miles.
Not looking forward to it.
Basic Tools
Car Jack
Jack Stand
1/4 inch ratchet driver
1/2 inch ratchet driver
1/2 inch drive extension
14mm socket
17mm socket and combo wrench
19mm socket and combo wrench
22mm socket and combo wrench
Plier
C-Clamp - to compress the brake pistons back in to reinsall the brake pads.
Hammer
PB Blaster or similar rust busters
Breaker bar
Rope or anything to tie something
Contingency (Plan B) Tools
5mm Drill bit
6mm Plug tap
Vise grip
Electric Drill
Here's a walk around of the front hub bearing assembly to get familiar with it (from now on will be referred to as FHBA):
Notice the orientation of what's up and what's down. You'll know why later on.
Side view of the FHBA
Outward view of the FHBA
Close up of the FHBA
This is a must to have for this project. PB Blaster has been the best that I have ever used in breaking loose any rusted parts.
Prop open the wheel center cap and start spraying the PB Blaster right away. The more time it has to soak in the better.
Straighten and remove the locking pin with a plier.
At this point do not jack up the truck yet. You gonna need the friction on the tire to loosen the hub nut.
Find yourself a nice breaker bar. The longer the easier it will be on your back.
This will bound to happen so make sure you have a back-up. Rachet with moving parts in the head is not ideal for this big job
so I recommend using a fixed-head rachet.
Once initially loose, the hub lug should screw out pretty easily. Don't forget the washer with it.
Now jack up the truck just enough to not put too much weight on the wheel and loosen the lug nuts.
and once all lugs are loosen, the jack can be fully lifted to give enough room for a jack stand. Once the stand is in place
lower the jack a little bit to firmly rest the weight of the truck on both the stand and the jack itself.
Now the brake and rotor are ready to come off.
As you can see, the speed sensor is pretty rusted out.
so give it lots of PB Blaster treatment
while you are at it, spray some on the brake bracket bolts as well.
Using a half inch driver and a hammer, tap the end of the driver to loosen the bolts.
Once the brake bracket bolts are loose, don't remove them all the way, loosen the brake caliper bolts first.
You'll need these off as well to re-install the pads back on later.
Once removed, tie the brake assembly onto the spring to keep it out of the way.
Here's a back shot of the rear of the hub.
If you have this, use it. A sliding hammer.
Spray some PB Blaster onto the contact area of the brake rotor and FHBA and let it stand for several minutes.
After several slides of the hammer the rotor comes off. Now you are ready to work on the FHBA.
Spray liberal amount of PB Blaster on the bolts of the FHBA and let it sit for a good 5 to 10 min.
Start loosening the FHBA bolts. Using a hammer to tap the end of the rachet will
help more than trying to put your own muscle force on it. They are pretty stiff, but not as bad as the hub lug nut.
Once all the bolts comes off, use the sliding hammer to work on the FHBA.
Alternate from one side to the other and working around the edges.
After a good 20 minute on the sliding hammer I realized it was a total waste of time.
The only way to dislodge this thing is from the back side. Remove the entire hub from the shock.
Took only three good solid hits with a cast iron hammer to get the thing loose.
I have came to a conclusion that sliding hammer is only good for dents on body panels.
The new FHBA goes in.
Remember what I said about the up and down side? Here's why.
If you installed it upside down, the speed sensor won't go in all the way.
And you'll be bitchin' at yourself for being so stupid like I did.
Next up...damn broken speed sensor bolt!!! I can't believe Infiniti used such a poor grade metal for this bolt!!!
Probably a grade 5 or lower. It a 10mm head but only a 6mm shaft. Formula for a catastrophy when rust comes to play.
The speed sensor comes out, but the broken nuts becomes a pain in the you know what.
Vise grip might work...not!!!! The quality of the metal use on this thing is so poor
the edge of the leftover piece just crumbled when I twisted the vise grip. Also tried a bolt extractor. Useless on rusted metal.
After an hour break and thinking it over again, I went shopping and found this!!! It's like wow! The greatest invention ever!!!
The speed sensor nut is exactly this size.
Use the drill to drill out the stuck bolt as much as you can but be careful not to damage the side of the hole.
Then use a vise grip to firmly hold the tap.
Start screwing the tap into the drilled hole. Be careful, when you start to feel resistence, unscrew it back out and remove
any metal filing on the tap head. Repeat until you get enough depth for a new screw. This will re-create the thread
that should fit any M6-5mm bolt.
Instead of using the same grade (OEM bolt) I found this Allen bolt that's at least a grade 8.
Works like a charm. No worries for future removal.
The speed sensor is now in place!!!
Start re-assemble things back on and don't forget that washer with the hub lug.
Before using the C-Clamp to compress the brake pistons, make sure you loosen the brake fluid reservoir
cap and slowly compress the pistons. Opening the reservoir cap will ease the pressure a bit and
minimize the risk of damaging the ABS controller. Bleeding the brake shouldn't be necessary
since you haven't introduce any air to the line. Make sure close the brake reservoir cap before pumping the brake.
Lower the truck and tighten the wheel lugs and the hub lug. Don't forget the locking pin and you're good for another 80 - 90K miles.
Not looking forward to it.
Last edited:


