Fire0nic3FX's 2006 Infiniti G35 Sedan Picture Thread

These morimoto projectors have a threaded mounting shaft so it fits right through the previous existing hole on the back of the G35 or any reflector headlight. Basically no cutting needed. I assume the hardest part will be removing the headlight and lens but that should be pretty much straight forward.

---------- Post Merged at 12:27 AM ---------- Previous Post was at 12:26 AM ----------

One thing I like is that I can use this car to experiment with things on I've always wanted to do like this projector retrofit.

Yea I saw a YouTube video. I havent seen a post on g35driver of someone doing this to a first gen, but then again i dont search much on forums anymore.
 
Last edited:
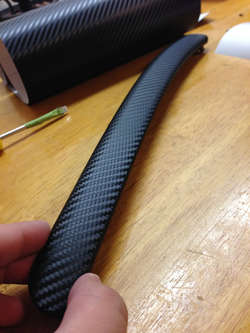
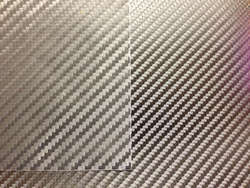
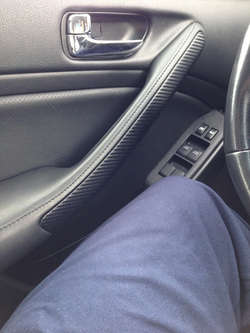
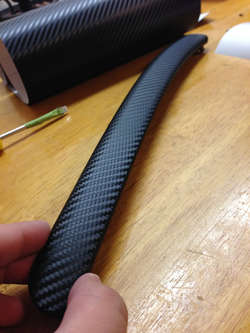
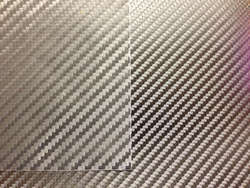
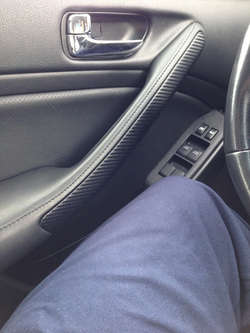
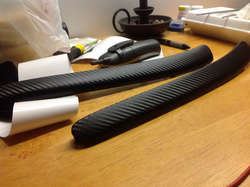
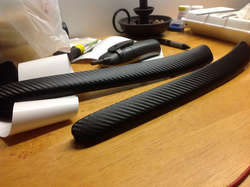
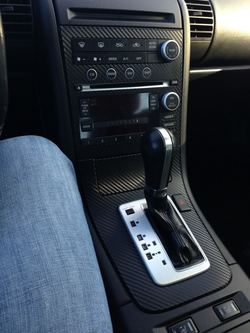
Spending the day getting rid of the ugly aluminum trim on the G. I used Simcarbon carbon fiber vinyl on the trim. I didn't want to used 3M Di Noc as I found it to be sort or ugly if you want to put it like that. The 3M stuff looks too light and grayish looking and has no gloss to it. I found the Simcarbon vinyl to look darker and a lot glossier at different angles. Looks damn close to real carbon fiber in my opinion. Here is some pics:

Wrapped:

72f38b43de7177b5b5a5669a7e92a8ba_zpsdb065db3.jpg

3M Di Noc on the left and Simcarbon on the right:


5a42bf99e7f1998b6ad5c9440158da79_zps27b51f81.jpg

Installed:

59f57ef895d3a80e2a162c457fa66687_zps6af30c9e.jpg

Not only is the SimCarbon cf cheaper ($17.99 for 12"x60"), but it also looks a million times better IMO and easier to work with. It reacts to the heat gun a lot better.

I'm just doing to the door handles and some pieces around the radio in cf. I see people try to wrap a lot of pieces in cf and it starts to look overdone and cheesy. I'm just doing enough pieces to the point where it looks "tastefully done".
 

Attachments

  • 72f38b43de7177b5b5a5669a7e92a8ba_zpsdb065db3.jpg
    72f38b43de7177b5b5a5669a7e92a8ba_zpsdb065db3.jpg
    104.6 KB · Views: 11
  • 5a42bf99e7f1998b6ad5c9440158da79_zps27b51f81.jpg
    5a42bf99e7f1998b6ad5c9440158da79_zps27b51f81.jpg
    251.7 KB · Views: 10
  • 59f57ef895d3a80e2a162c457fa66687_zps6af30c9e.jpg
    59f57ef895d3a80e2a162c457fa66687_zps6af30c9e.jpg
    136.5 KB · Views: 10
Last edited:
Thanks. I have a lot more things to do. I'm still waiting on my morimoto projectors to come so I can paint the headlights and install them.
 
That simcarbon really pops out, I'm not sure if the wrap I ordered for my interior is simcarbon also. I know the wrap on my exterior is regular carbon fiber wrap because it looks a bit faded in the light.

Sent from my SGH-T999 2
 
Nice. Another happy simcarbon customer here. Hopefully it holds up when the summer heat comes around

sent
 
Is simcarbon good to use on the outside of the car. On my previous rides, no matter what I used always faded out and looked shity after awhile
 
Interesting.. I did use SIM carbon for my interior. Lol
I went to Amazon to go look at simcarbon and I forgot I uploaded a couple pics for my review of the sheet I received
 
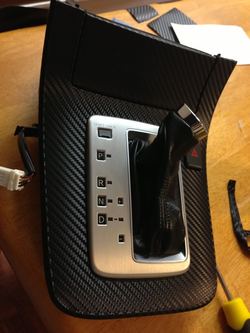
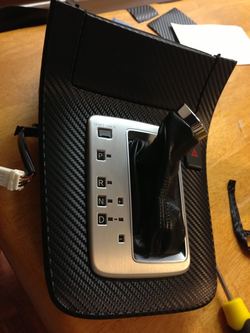
Worked on the lower center console today. Came out absolutely perfect:

8D302585-40E7-4FFF-97CC-8868C59C5883-433-000000237369614B_zpsdffb96fa.jpg


Attention to detail with the Xacto knife is key to making it look OEM. Edges on the coin holder door I cut perfect as can be:

87AB8B35-F0B5-4EF8-8394-3E41528F932F-433-00000023EC7EE360_zps7c98bef8.jpg
 

Attachments

  • 8D302585-40E7-4FFF-97CC-8868C59C5883-433-000000237369614B_zpsdffb96fa.jpg
    8D302585-40E7-4FFF-97CC-8868C59C5883-433-000000237369614B_zpsdffb96fa.jpg
    97.2 KB · Views: 12
  • 87AB8B35-F0B5-4EF8-8394-3E41528F932F-433-00000023EC7EE360_zps7c98bef8.jpg
    87AB8B35-F0B5-4EF8-8394-3E41528F932F-433-00000023EC7EE360_zps7c98bef8.jpg
    62.4 KB · Views: 19
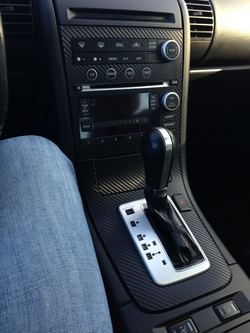
Finished up the center console today:

5891A724-B802-45B1-BE56-723F697F0C09-254-0000000DE5BDEE0B_zps14adf38a.jpg
 

Attachments

  • 5891A724-B802-45B1-BE56-723F697F0C09-254-0000000DE5BDEE0B_zps14adf38a.jpg
    5891A724-B802-45B1-BE56-723F697F0C09-254-0000000DE5BDEE0B_zps14adf38a.jpg
    145.6 KB · Views: 13
Back
Top